
Home → Setup, Safety, and Repairs > Outdoor Power Accessories → Smart Plug Automation Strategies for Outdoor Holiday Decorations & Inflatables
Smart Plug Automation Strategies for Outdoor Holiday Decorations and Inflatables
Learn the best smart plug automation strategies for outdoor holiday decorations and inflatables, including staggered startup schedules, vacation lighting, energy savings, weather protection, and safe outdoor power management.
By Frank "Frosty" Adminei
7/7/202617 min read
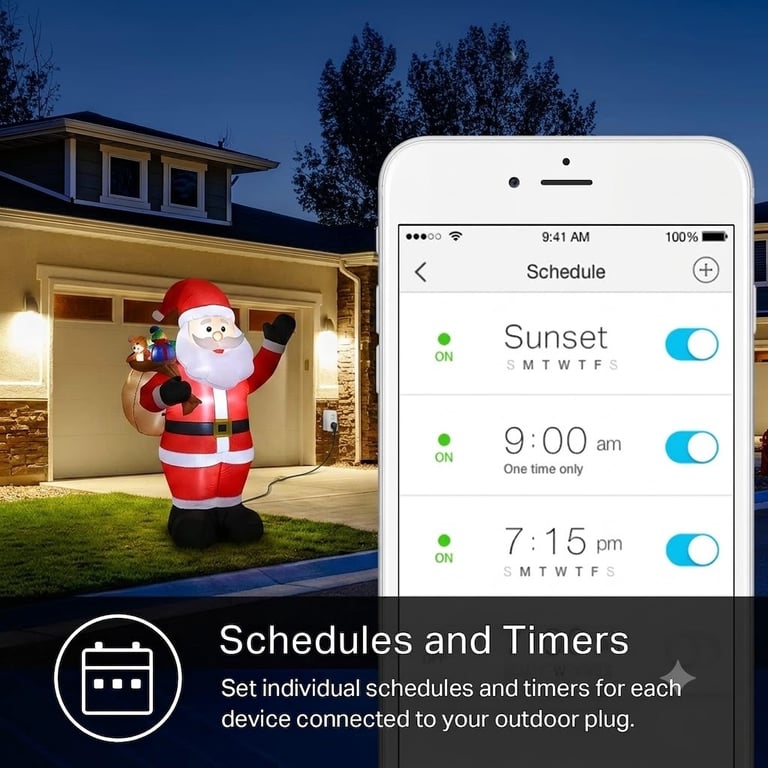
Table of Contents
Introduction
Outdoor holiday decorating has changed dramatically over the last decade. What once required manually plugging in extension cords every evening can now be automated with a few taps on a smartphone. Modern outdoor smart plugs let you schedule lights and inflatables, create sunset routines, monitor some devices remotely, and even control displays while you're away on vacation.
For many decorators, the convenience alone is worth the investment. No more rushing home before dark to turn everything on. No more walking through snow or rain to unplug decorations before bed. And no more wondering whether you remembered to shut everything off before leaving for the weekend.
However, smart plugs are often misunderstood. They are excellent automation devices, but they are not electrical safety devices. A smart plug cannot fix an overloaded circuit, compensate for an undersized extension cord, or keep a wet electrical connection safe. The best results come from combining smart automation with good power planning, weatherproof equipment, and realistic expectations.
This guide focuses on practical strategies rather than complicated smart-home programming. Whether you're decorating for Christmas, Halloween, Easter, patriotic holidays, or any other seasonal celebration, these techniques can help you build a display that's easier to manage, more efficient to operate, and less likely to cause frustration throughout the season.
Who This Guide Is For
This guide is designed for:
First-time decorators purchasing their first outdoor smart plug
Homeowners upgrading from traditional mechanical timers
Families running multiple inflatables or animated decorations
Holiday enthusiasts who travel during decorating season
Anyone looking to simplify daily setup and shutdown routines
Decorators who want smarter scheduling without creating electrical problems
Whether your display includes one inflatable or an entire front-yard holiday scene, the automation principles remain the same.
Why Smart Plug Automation Matters
Many people initially buy an outdoor smart plug because they want to control decorations from their phone. While that's certainly useful, experienced decorators quickly discover that automation offers several additional benefits.
A well-planned schedule can reduce unnecessary operating hours, helping lower electricity usage without noticeably affecting your display. Smart plugs also make it easier to coordinate inflatables, pathway lights, spotlights, and other decorations so everything activates in a consistent sequence.
Automation becomes especially valuable during bad weather. Instead of walking outside through freezing rain or fresh snow just to unplug decorations, you can manage your display from inside the house—or from miles away if you're traveling.
Smart plugs also encourage more consistent operation. Because schedules repeat automatically, decorations turn on and off at the same times every day without relying on memory or manual effort. That consistency keeps your display looking polished while reducing the chance that decorations remain on long after visitors have gone home.
The biggest advantage, however, is that automation gives you control. Once your electrical setup is safe and properly planned, smart plugs remove much of the daily work associated with maintaining an outdoor holiday display.
What Outdoor Smart Plugs Actually Do
One of the biggest misconceptions is that outdoor smart plugs somehow improve the electrical capacity of your display. They don't. Their primary job is controlling when electricity flows to equipment—not increasing how much electricity is available.
Modern outdoor smart plugs commonly provide:
Scheduled daily on/off times
Sunset and sunrise automation
Countdown timers
Smartphone control from virtually anywhere
Voice control through compatible smart-home assistants
Individual outlet control on supported models
Temporary manual overrides without deleting schedules
Repeating weekly automation
For holiday decorators, these features open the door to much more flexible display management than traditional timers.
For example, you might schedule inflatables to begin inflating a few minutes before your landscape lighting activates, creating a more polished presentation. If bad weather rolls in unexpectedly, you can shut down sensitive decorations remotely without leaving the comfort of your home. And when you're away on vacation, you can adjust schedules to match changing sunset times or extend operating hours for a neighborhood holiday event.
Some newer outdoor smart plugs also support energy monitoring, allowing you to track the electricity used by connected devices. While not every model includes this feature, it can be helpful for understanding the operating costs of larger displays.
Recommended Outdoor Smart Plug Options
Several models from your approved product list are well suited for outdoor decorating, each serving slightly different needs.
Best Overall Choice: Kasa Outdoor Smart Plug
The Kasa Outdoor Smart Plug is an excellent all-around option thanks to its long Wi-Fi range, IP64 weather resistance, compatibility with Alexa and Google Home, and support for loads up to 15 amps (1,875 watts). It is particularly well suited for homeowners who want reliable scheduling and straightforward app control.
Best for Mixed Smart-Home Platforms: TP-Link Tapo Matter Outdoor Smart Plug
If your household uses different smart-home ecosystems, the TP-Link Tapo Matter Outdoor Smart Plug offers broad compatibility through Matter support. Its dual independently controlled outlets make it easy to automate different sections of a display without installing multiple smart plugs.
Best Alexa-Focused Option: Amazon Basics Outdoor Smart Plug
Homeowners already invested in Alexa will appreciate the simple setup and individually controlled outlets offered by the Amazon Basics Outdoor Smart Plug.
Budget-Friendly Alternative: BN-LINK Outdoor Smart Plug
The BN-LINK Outdoor Smart Plug offers dependable scheduling, countdown timers, and weather-resistant construction, making it a good choice for smaller displays where individual outlet control isn't required.
Best Value with Energy Monitoring: Wyze Outdoor Plug
For decorators interested in monitoring electricity usage alongside automation, the Wyze Outdoor Plug adds energy-monitoring capabilities while maintaining weather-resistant outdoor operation.
Planning a purchase? If you're comparing features, outlet configurations, ecosystem compatibility, and value, see "Best Smart Plugs for Holiday Inflatables (2026 Buyer's Guide)" for a detailed breakdown of the models in this guide before deciding which one best fits your display.
What Smart Plugs Do NOT Fix
Outdoor smart plugs are excellent automation devices, but they are often credited with solving problems they were never designed to address. Understanding their limitations is just as important as understanding their features.
If your display already has electrical problems, adding a smart plug will simply automate those problems.
For example, if an overloaded circuit trips every evening around 6:00 PM, scheduling a smart plug to turn everything on at 5:30 PM won't prevent the breaker from tripping. Likewise, if a damaged extension cord is heating excessively or a plug connection is sitting in standing water, automation won't make either situation safer.
Think of a smart plug as the "switch" in your outdoor display—not the foundation of the electrical system.
Smart Plugs Don't Increase Circuit Capacity
Every household circuit has a maximum safe electrical load. Whether you're running one inflatable or an entire neighborhood display, that limit doesn't change because a smart plug is controlling the outlet.
If you're unsure how much your display is actually using, read "How Many Inflatables Can One Circuit Handle?" before adding more decorations. Understanding your available capacity is the first step toward reliable automation.
Smart Plugs Don't Prevent Breaker Trips
One of the biggest myths is that smart plugs somehow reduce electrical demand.
They don't.
What can help is how you schedule them.
If several large blower motors start simultaneously, the brief inrush current can occasionally cause nuisance breaker trips on already heavily loaded circuits. Later in this guide we'll discuss staggered startup strategies that may reduce these simultaneous startup events—but even those strategies cannot compensate for an overloaded circuit.
If breakers are already tripping regularly, your first stop should be "Why Your Outdoor Inflatable Keeps Tripping the Breaker (And How to Fix It)", where you'll find troubleshooting steps before investing in additional automation.
Smart Plugs Don't Protect Wet Electrical Connections
Outdoor-rated smart plugs are designed to tolerate rain and weather exposure, but the plug connection itself still needs protection.
A smart plug connected to:
a partially unplugged extension cord
an exposed power strip
a loose adapter
a puddle-prone location
creates the same risks as any other outdoor electrical connection.
Protect every connection using an appropriately sized weatherproof cord connection box or cord lock, and keep connections elevated whenever possible.
Smart Plugs Don't Replace GFCI Protection
Ground Fault Circuit Interrupter (GFCI) protection exists to reduce the risk of electric shock when electricity and moisture meet.
A smart plug does not perform that function.
Whenever practical, outdoor holiday displays should be connected to GFCI-protected outlets or protected using an outdoor-rated GFCI device.
Smart Plugs Don't Fix Undersized Extension Cords
Using a 16-gauge extension cord where a heavier 12-gauge cord is appropriate can still lead to excessive voltage drop over longer distances.
Automation doesn't change wire size.
Choosing the proper extension cord remains one of the most important parts of building a reliable display. If you haven't already, see "Best Outdoor Extension Cords for Holiday Inflatables (2026 Buyer's Guide)" for guidance on selecting the appropriate cord for your layout.
Strategy #1 — Stagger Startup Times Instead of Turning Everything On at Once
This is one of the simplest automation techniques experienced decorators use, yet it receives very little attention in most smart plug articles.
Instead of programming every decoration to turn on at exactly the same moment, spread startup over several minutes.
Rather than this:
Time
5:00 PM
Everything
Use something like this:
Time
5:00 PM
Landscape lighting
5:02 PM
Small inflatables
5:04 PM
Medium inflatables
5:06 PM
Large inflatables and animated decorations
This approach offers several practical advantages.
Reduce Simultaneous Startup Demand
Many outdoor inflatables use blower motors that briefly draw more current when they first start than they do during normal operation. If several blowers start at exactly the same time on the same circuit, that temporary surge may contribute to nuisance breaker trips when the circuit is already close to its limit.
By staggering startup over a few minutes, you avoid having every blower attempt to start simultaneously. While this does not increase the circuit's overall capacity, it can make startup smoother on properly designed systems.
Identify Problems More Easily
Another advantage of staggered startup is troubleshooting.
If everything turns on at once and something fails, it can be difficult to determine which device caused the issue.
When decorations start in sequence, it's much easier to identify:
which inflatable failed to inflate
which smart plug didn't respond
whether a specific extension cord lost power
whether a particular section tripped a breaker
Instead of searching the entire yard, you can immediately focus on the section scheduled during that time window.
Create a More Polished Presentation
Staggered startup isn't only about electrical management—it also improves the visual experience.
Imagine your display coming to life in stages:
Pathway lights illuminate first.
House lighting follows.
Small inflatables begin inflating.
Larger centerpiece inflatables rise into place.
Spotlights activate last to highlight the finished display.
The result feels intentional and professional rather than abrupt.
Example Automation Plans
Small Display (1–3 inflatables)
5:00 PM – Decorative lights
5:01 PM – Main inflatable
5:02 PM – Accent decorations
Medium Display (4–8 inflatables)
5:00 PM – House lighting
5:02 PM – Front-yard inflatables
5:04 PM – Side-yard decorations
5:06 PM – Spotlights and animated props
Large Display (10+ decorations)
Divide decorations across multiple circuits.
Assign each circuit its own smart plug or controller.
Offset startup by two to five minutes between circuits.
Verify total circuit load before enabling schedules.
If you're building a larger display, "How to Power Multiple Outdoor Inflatables Safely Without Overloading Your Circuit" explains how to distribute decorations across circuits and extension cords before adding automation.
Helpful Hint
Before decorating season begins, trigger each scheduled event manually from the app to confirm every device responds as expected. It's much easier to correct a missed schedule in October than after your yard is fully decorated in December.
Strategy #2 — Vacation Lighting That Looks Natural
One of the biggest advantages of outdoor smart plugs is the ability to control your display even when you're hundreds of miles away. Whether you're visiting family for Thanksgiving, traveling over Christmas, or away for a winter weekend, automation keeps your home looking occupied and your decorations operating without daily attention.
However, there's a difference between simply turning decorations on every day and creating schedules that look natural.
Avoid the "Every Day at Exactly 5:00 PM" Look
Many first-time users create one schedule:
ON: 5:00 PM
OFF: 10:00 PM
Every.
Single.
Day.
While this works, it can become obvious—especially as sunset shifts earlier or later throughout the season.
A better approach is to use your smart plug's sunset automation (if available) or periodically adjust schedules to match changing daylight hours.
For example:
Time Period
Suggested Schedule
Early November
Sunset → 9:30 PM
Late November
Sunset → 10:00 PM
December Weekends
Sunset → 11:00 PM
Christmas Week
Sunset → Midnight (if desired)
Weekdays
Slightly shorter runtime
This keeps your display aligned with natural lighting conditions instead of relying on a fixed clock time.
Build Different Schedules for Weekdays and Weekends
Most families spend more time enjoying decorations on Friday and Saturday evenings than they do on a Tuesday night.
Take advantage of that.
For example:
Monday–Thursday
On at sunset
Off at 9:30 PM
Friday–Saturday
On at sunset
Off at 11:00 PM
Sunday
On at sunset
Off at 9:00 PM
The result is a display that's enjoyable when people are most likely to see it while avoiding unnecessary overnight operation.
Create "Vacation Mode" Before You Leave
A helpful habit is creating a dedicated schedule before traveling.
Consider:
Verify all schedules are active.
Confirm your home's Wi-Fi is working properly.
Test remote access from your phone before leaving.
Ensure automatic daylight-saving adjustments are enabled if supported.
Check that family members know how to manually override the system if needed.
Five minutes of preparation can prevent a frustrating phone call asking why the Christmas display never turned on.
Use Remote Control for Unexpected Situations
Weather changes quickly during the holiday season.
Remote control allows you to:
shut off decorations during severe storms
extend display hours for neighborhood events
turn everything off after returning home late
activate decorations early for guests
These small conveniences often become the features owners appreciate most after an entire decorating season.
Strategy #3 — Reduce Energy Costs Without Losing Display Impact
Smart plugs won't magically lower your electric bill, but they can help reduce unnecessary operating hours.
The easiest way to save energy is simply to avoid running decorations when nobody is likely to see them.
Schedule Around Real Viewing Hours
Ask yourself:
When are people actually looking at your display?
For many neighborhoods:
Peak viewing: 5:30–8:30 PM
Moderate viewing: 8:30–10:00 PM
Very little viewing: after 11:00 PM
Running decorations until 2:00 AM every night may not provide much additional enjoyment.
Instead, schedule around when your display delivers the most value.
Use Different Schedules for Different Holidays
Not every season requires identical operating hours.
Examples:
Halloween
Weekend evenings longer
Weekday schedules shorter
Extended hours on Halloween itself
Christmas
Longer schedules after Thanksgiving
Maximum runtime Christmas Eve
Reduced hours after Christmas Day
Easter
Shorter evening windows
Weekend emphasis
Patriotic Holidays
Primarily evening operation around specific holiday weekends
Automation makes these seasonal adjustments simple instead of requiring manual changes every night.
Measure Before You Guess
Many decorators overestimate—or underestimate—the amount of electricity their displays actually consume.
Instead of guessing, measure it.
A plug-in electricity monitor allows you to determine:
actual watts
amps
voltage
accumulated energy use
estimated operating cost
This information helps you:
verify circuit loading
estimate seasonal operating costs
identify unexpectedly high-consuming decorations
plan future display expansions
Recommended Watt Meters
For homeowners wanting accurate measurements before adding automation, both approved watt meters fit naturally into this workflow.
A budget-friendly option that displays watts, amps, volts, power factor, cumulative energy use, and estimated electricity cost.
The long-time standard for measuring appliance power consumption. It's particularly useful when calculating the true electrical demand of larger inflatables before connecting them to automated schedules.
These devices don't automate anything—but they provide the information needed to automate confidently.
For a broader discussion of holiday electricity costs, see "LED vs Incandescent Holiday Decoration Costs: What Outdoor Decorators Need to Know."
Strategy #4 — Combine Smart Plugs with Proper Power Planning
Smart plugs work best when they're part of a complete outdoor power system rather than the only upgrade.
Think of automation as the final layer—not the foundation.
A dependable setup typically includes:
properly sized outdoor extension cords
GFCI protection
weatherproof connection boxes
organized cord routing
correctly distributed circuit loads
smart automation
Each component solves a different problem.
Heavy-Duty Extension Cords
Your extension cord still determines how safely electricity reaches your decorations.
General guidance:
16-gauge cords
Best for:
shorter runs
lower-power displays
individual inflatables
12-gauge cords
Best for:
longer distances
multiple decorations
larger seasonal displays
future expansion
Smart plugs don't reduce voltage drop, so selecting the proper cord remains essential.
Weatherproof Cord Boxes
Many decorators carefully protect the smart plug itself while leaving the actual plug connection exposed.
That's backwards.
The plug connection usually deserves the greatest protection.
Depending on your setup, the following approved weatherproof boxes fit different situations:
Small installations
Medium installations
Large power hubs
For a complete comparison, see "Best Weatherproof Cord Connection Boxes for Outdoor Decorations."
Add GFCI Protection Where Needed
If your outlet isn't already GFCI protected, adding an approved outdoor GFCI solution provides another layer of protection.
Remember, GFCI protection helps reduce shock hazards—it doesn't increase available electrical capacity.
Organize Cords Before You Automate
Automation doesn't eliminate trip hazards.
Before finalizing schedules:
route cords away from walkways
secure loose cables
protect connections from foot traffic
elevate plug connections where practical
label circuits if using multiple smart plugs
If your display uses several extension cords, you'll also benefit from "Best Outdoor Cord Management Accessories for Holiday Displays (Clips, Stakes, Covers & Safer Setup Guide)."
Helpful Hint
When building a new display, install and test the entire power system first. Once everything operates reliably under manual control for a few days, enable automation. Separating electrical troubleshooting from automation setup makes it much easier to identify and solve problems.
Strategy #5 — Protect Smart Plug Connections From Weather
Most outdoor smart plugs are designed to withstand rain, snow, and changing temperatures. However, the plug itself is rarely the weakest point in your setup.
The vulnerable areas are usually the connections between:
the smart plug and the extension cord
the extension cord and the inflatable
power strips and adapters
splitter connections
Those are the places where water can enter if they're left exposed.
Protecting these connections is one of the simplest ways to improve long-term reliability.
Keep Connections Off the Ground
Even if your yard appears dry, water can collect surprisingly quickly after rain or melting snow.
Avoid placing connections:
in mulch
directly on grass
in low spots
beneath roof drip lines
where sprinklers regularly spray
Instead:
elevate connections when practical
secure cords so they don't pull apart
keep smart plugs hanging naturally rather than supporting their weight by the electrical connection
Use Weatherproof Connection Boxes
For most inflatable displays, weatherproof connection boxes provide much better protection than simply wrapping connections with electrical tape or placing them under a bucket.
Small displays may only require a compact connection box, while larger installations often benefit from boxes that accommodate power strips, timers, and multiple adapters.
Recommended options from your approved product list include:
Small Connections
Ideal for:
one extension cord
one inflatable
one smart plug
Medium Setups
Ideal for:
smart plugs
power strips
several cord connections
Large Power Centers
Ideal for:
multiple smart plugs
yard power centers
larger adapters
several extension cords entering one protected location
If you're unsure which size fits your installation, "Best Weatherproof Cord Connection Boxes for Outdoor Decorations" compares these options in detail.
Add Cord Locks for Smaller Connections
Not every setup requires a full weatherproof box.
For a single extension cord connection, products like the Farm Innovators CC-1 Cord Connect provide an inexpensive way to reduce accidental disconnects while helping keep moisture away from the connection.
These are particularly useful for:
porch decorations
walkway inflatables
temporary seasonal displays
Don't Forget Drip Loops
One simple technique electricians often use is the drip loop.
Instead of allowing a cord to run directly into the plug, let it dip slightly below the connection before rising back up.
Outlet
│
│
│
\_/
│
Connection
If rainwater travels down the cord, gravity encourages it to drip off at the bottom of the loop instead of continuing directly into the connection.
It's a small detail, but one that can make a noticeable difference during extended wet weather.
Strategy #6 — Build Reliable Outdoor Wi-Fi Coverage
One of the most common complaints about outdoor smart plugs has nothing to do with electricity.
It's Wi-Fi.
Many decorators install a smart plug in the front yard only to discover that their router barely reaches the front porch.
Before decorating season begins, verify that your Wi-Fi signal is actually strong where the smart plug will be installed.
Understand the 2.4 GHz Requirement
Nearly every outdoor smart plug in your approved product list uses 2.4 GHz Wi-Fi rather than 5 GHz.
This is intentional.
Although 5 GHz offers higher speeds, 2.4 GHz generally travels farther and penetrates walls more effectively, making it better suited for outdoor smart devices.
If your router combines both frequencies under one network name, follow the manufacturer's setup instructions carefully. Some smart plugs may require temporary adjustments during initial pairing.
Test Signal Strength Before Decorating
Don't wait until every inflatable is staked into the yard.
Instead:
plug the smart plug into its planned location
connect it to Wi-Fi
walk away with your phone
test remote control several times
If commands respond slowly or fail intermittently, improve Wi-Fi coverage before the decorating season begins.
Common Wi-Fi Obstacles
Outdoor signals can be weakened by:
brick walls
stone foundations
metal siding
detached garages
aluminum storm doors
long distances from the router
Even large shrubs or dense landscaping can slightly reduce signal quality.
Improve Outdoor Coverage
If coverage is marginal, consider:
relocating the router
adding a mesh Wi-Fi node
placing a mesh unit near the front of the house
using an access point in the garage
testing multiple smart plug locations before permanently routing cords
Reliable Wi-Fi is just as important as reliable electrical connections when you're depending on automation every evening.
Helpful Hint
After severe storms or extended power outages, open your smart plug app and confirm that every device has successfully reconnected before the next scheduled automation.
Which One Should You Choose?
Choose an outdoor smart plug if you want:
smartphone control
remote access
flexible schedules
vacation automation
voice assistants
Choose a mechanical timer if you want:
maximum simplicity
no Wi-Fi
inexpensive daily automation
Choose a digital timer if you want:
programmable schedules
no smartphone required
repeatable automation
Choose a power stake timer if you have:
multiple inflatables
several extension cords
one central power location
larger yard displays
For many decorators, the best solution isn't choosing one product—it's combining them.
Recommended Smart Plug Setups
Small Display (1–3 Decorations)
Recommended equipment:
Ideal for:
one or two inflatables
porch displays
apartment or townhouse decorating
Medium Display (4–8 Decorations)
Recommended equipment:
Good balance of:
convenience
safety
expansion potential
Large Display (10+ Decorations)
Recommended equipment:
Multiple dedicated circuits
Large Flemoon or Hrensaw weatherproof boxes
If your display has reached this size, "Best Outdoor Power Solutions for Large Multi-Inflatable Displays (10+ Units)" provides additional planning strategies.
Helpful Smart Plug Tips Most People Learn the Hard Way
Experienced decorators often mention the same lessons after a few holiday seasons:
Label each smart plug in the app ("Front Porch," "Santa," "Nativity," etc.).
Test every automation schedule before decorating day.
Rename outlets so family members know what each one controls.
Update firmware before November instead of during peak decorating season.
Verify your time zone after app updates.
Confirm schedules after daylight saving time changes.
Keep smart plugs above expected snow levels whenever possible.
Avoid burying plugs under mulch or leaves where moisture can collect.
Keep spare batteries available if your automation system also includes remote-controlled timers.
After a power outage, confirm that every plug has reconnected before relying on the next scheduled event.
Leave enough slack in cords to prevent tension from pulling plug connections apart.
Measure electrical loads before adding "just one more" inflatable.
Small habits like these can prevent many of the problems that frustrate first-time decorators.
Complete Your Outdoor Power System
If you're already purchasing outdoor smart plugs, consider building a more reliable and easier-to-maintain display by adding a few complementary accessories at the same time:
A Kill-A-Watt meter to measure actual electrical load before expanding your display.
A weatherproof connection box to protect plugs, adapters, and timers from rain and snow.
A heavy-duty outdoor extension cord sized appropriately for your display.
A GFCI extension cord or outdoor GFCI power strip for additional electrical protection where needed.
Cord management accessories to keep cables organized, reduce trip hazards, and protect connections.
Purchasing these items together can save additional shipping costs, simplify installation, and help prevent many of the most common outdoor holiday power problems.
Key Takeaways
Outdoor smart plugs make holiday decorating more convenient but do not increase circuit capacity or replace electrical safety practices.
Staggering startup times can improve reliability for larger displays by avoiding simultaneous blower startup.
Use seasonal schedules and vacation automation to reduce unnecessary operating hours while keeping your display looking active.
Pair smart plugs with properly sized extension cords, GFCI protection, and weatherproof connection boxes for the best overall results.
Reliable Wi-Fi coverage is essential for dependable automation—test it before decorating season begins.
Measure electrical loads with a watt meter before expanding your display.
Smart plugs work best as part of a complete outdoor power system, not as a standalone solution.
Mini Conclusion
Outdoor smart plugs are one of the easiest upgrades you can make to a holiday display. They simplify daily operation, make vacation lighting effortless, and give you much greater flexibility than traditional timers. The most successful displays, however, combine automation with good electrical planning. By pairing smart plugs with appropriate extension cords, GFCI protection, weatherproof connection boxes, and thoughtful scheduling, you'll create a display that's easier to manage, more reliable throughout the season, and safer for years to come.
Frequently Asked Questions
Can a smart plug prevent my breaker from tripping?
No. A smart plug controls power but does not increase circuit capacity. Proper load planning is still essential.
Can I put multiple inflatables on one smart plug?
Yes, as long as the total electrical load stays within both the smart plug's rating and the circuit's safe capacity.
Do outdoor smart plugs work after a power outage?
Most reconnect automatically once power and Wi-Fi return, but it's good practice to verify this after any outage.
Are outdoor smart plugs waterproof?
Most are weather-resistant rather than waterproof. Always protect electrical connections from standing water and use weatherproof connection boxes where appropriate.
Do I need Wi-Fi all season?
Yes. Most outdoor smart plugs require an active 2.4 GHz Wi-Fi connection for app control and cloud-based scheduling.
Can I control my holiday lights with Alexa or Google Assistant?
Many outdoor smart plugs support voice assistants, allowing you to turn compatible decorations on or off with voice commands.
Will smart plugs reduce my electric bill?
They won't reduce electricity use by themselves, but they can help by ensuring decorations run only when needed.
What's better: a smart plug or an outdoor timer?
Smart plugs offer greater flexibility and remote control, while timers are simpler and don't rely on Wi-Fi. The best choice depends on your display and preferences.
Related Articles
If you found this guide helpful, continue building a safer and more reliable display with these related resources:
Best Smart Plugs for Holiday Inflatables (2026 Buyer's Guide) — Compare features, smart-home compatibility, and the best models for different display sizes.
How to Power Multiple Outdoor Inflatables Safely Without Overloading Your Circuit — Learn how to distribute loads across circuits and avoid nuisance breaker trips.
Best Weatherproof Cord Connection Boxes for Outdoor Decorations — Protect plugs and adapters from rain, snow, and winter weather.
How Many Inflatables Can One Circuit Handle? — Estimate safe electrical loads before expanding your display.
Best Outdoor Power Stakes & Multi-Outlet Yard Power Centers (2026 Buyer's Guide) — Explore centralized power solutions for larger decorating layouts.