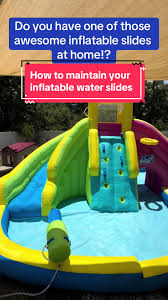
Inflatable Water Slide Repair & Maintenance Guide (2026 Edition)
Learn how to repair and maintain an inflatable water slide with this step by step 2026 guide. Includes leak detection, patching, seam repair, blower care, and seasonal maintenance tips.
Written by Frank “Frosty” Adminei
4/6/20265 min read

To repair and maintain an inflatable water slide, inspect it regularly, patch small holes with vinyl or Oxford repair patches, reinforce seams, clean and dry it after each use, and store it properly. Good maintenance prevents leaks, sagging, and premature wear.
“A well‑maintained slide stays firm, safe, and fun for years.”
Overview
This guide covers everything you need to keep your inflatable water slide in top shape: how to find leaks, patch holes, fix seam issues, maintain the blower tube, prevent mold, and keep the fabric strong. Whether you’re repairing a small tear or doing seasonal maintenance, these steps keep your slide performing like new.
“Most inflatable repairs take less than 10 minutes once you know what to look for.”
INTRODUCTION — Why Repair & Maintenance Matter
Inflatable water slides take a beating — climbing, sliding, splashing, sun exposure, and constant movement all wear down the fabric over time. Without proper maintenance, you’ll eventually deal with:
Slow leaks
Sagging walls
Weak seams
Mold or mildew
Blower‑tube issues
Sprayer misalignment
The good news is that most problems are easy to fix with basic tools and a few minutes of attention. This guide gives you a complete, step‑by‑step system for keeping your slide firm, safe, and ready for summer fun.
For safe setup before performing repairs, review the Setup Guide for Inflatable Water Slides.
Tools & Supplies You’ll Need
You don’t need professional equipment — just a few simple items.
Basic Repair Kit
Oxford or vinyl repair patches
Fabric glue or vinyl adhesive
Scissors
Rubbing alcohol
Soft cloths
Mild soap
Needle & polyester thread (for seam reinforcement)
Duct tape (temporary fix only)
Optional Tools
Soapy‑water spray bottle (for leak detection)
UV‑resistant seam sealer
Small roller (for smoothing patches)
Avoid
Super glue
Hot glue
Harsh solvents
Heat guns
These can damage Oxford cloth or melt stitching.
How to Inspect Your Slide for Damage
Regular inspections prevent small issues from becoming big repairs.
What to Look For
Soft spots or sagging areas
Hissing sounds
Visible holes or punctures
Loose seams
Worn anchor loops
Cracked sprayer lines
Blower tube leaks
How to Perform a Full Inspection
Inflate the slide fully.
Walk around the entire structure.
Press gently on walls and seams.
Listen for air escaping.
Check the underside (often overlooked).
Mini Example
If the slide leans to one side, check the seams and anchor loops on that side — they often reveal the issue.
How to Find Leaks (Fast & Accurate)
Finding leaks is easy once you know the right method.
Method 1 — Soapy Water Spray
Mix dish soap + water in a spray bottle.
Spray seams, walls, and suspect areas.
Look for bubbles — that’s your leak.
Method 2 — Hand Sweep
Run your hand slowly along the surface and feel for air movement.
Method 3 — Listen Closely
Small leaks often make a faint hissing sound.
Where Leaks Usually Occur
Seams
Slide lane edges
Climbing wall footholds
Anchor loops
Underside fabric
Mini Example
If the slide slowly sags over 10–15 minutes, you likely have a small seam leak — use the soapy‑water method to pinpoint it.
How to Patch Holes (Oxford & Vinyl)
Small holes and punctures are the most common inflatable‑slide repair — and the easiest to fix. With the right patch and adhesive, most repairs take under 10 minutes.
🎯 Step‑by‑Step: Patching a Hole in Oxford Cloth
(Oxford is the material used in almost all residential inflatable slides.)
1. Clean the Area
Inflate the slide fully.
Wipe the damaged area with mild soap + water.
Dry completely.
Wipe with rubbing alcohol to remove oils.
If the slide needs cleaning before patching, see the Cleaning Guide for Inflatable Water Slides.
2. Cut the Patch
Use an Oxford repair patch (usually included with the slide).
Cut a rounded‑edge patch — sharp corners peel faster.
3. Apply Adhesive
Use fabric glue or vinyl adhesive.
Apply a thin, even layer to the patch.
4. Press & Smooth
Press the patch firmly over the hole.
Smooth out air bubbles with your fingers or a small roller.
5. Let It Cure
Keep the slide inflated for 2–4 hours.
Avoid water until fully cured.
Mini Example
If a stick punctures the splash‑pool wall, a 2–3 inch rounded patch is usually enough to restore full pressure.
🎯 Step‑by‑Step: Patching a Vinyl Section
(Some slides have vinyl bottoms or vinyl‑reinforced areas.)
Same process as Oxford, but:
Use vinyl‑specific adhesive
Apply slightly more pressure when smoothing
Allow longer cure time (4–6 hours)
Vinyl patches bond extremely well when done correctly.
How to Repair Seams
Seam issues are less common but more important. A weak seam can cause sagging or slow leaks.
🎯 How to Identify a Seam Problem
Air escaping along a straight line
Fabric pulling apart
Stitching loosening
Slide leaning to one side
🎯 How to Repair a Minor Seam Leak
1. Clean the Area
Use mild soap + water, then dry.
2. Apply Seam Sealer
Use a UV‑resistant fabric seam sealer and run a thin bead along the seam.
3. Press & Hold
Use your fingers or a roller to press the seam together.
4. Let It Cure
Allow 12–24 hours before water use.
🎯 How to Reinforce a Weak Seam (Non‑Structural)
If the seam is intact but looks stressed:
Stitch with polyester thread
Apply seam sealer over the stitching
Add a small patch over the area if needed
Mini Example
If the climbing‑wall seam feels soft but not leaking, reinforcing with seam sealer is usually enough.
Fixing Blower Tube Leaks
The blower tube is the lifeline of the entire slide. Even a small leak here can cause sagging or slow inflation.
🎯 Common Blower Tube Problems
Loose drawstring
Small tears
Worn fabric from dragging
Poor connection to the blower
🎯 How to Fix a Blower Tube Leak
1. Check the Connection
Make sure the tube is:
Fully wrapped around the blower
Drawstring pulled tight
No gaps or folds
2. Patch Small Tears
Use the same patching method as Section 4.
3. Reinforce the Tube Base
If the base of the tube is wearing out:
Apply a vinyl or Oxford patch
Add seam sealer around the base
4. Replace the Drawstring (If Needed)
A loose drawstring can cause major air loss.
Replace with a paracord‑style cord
Tie a double knot
Mini Example
If the slide inflates but slowly sags, check the blower tube first — it’s the most common source of slow leaks.
Maintaining the Blower
The blower is the heart of the entire inflatable system. A clean, well‑maintained blower keeps airflow strong and prevents overheating.
How to Maintain the Blower
Keep it dry at all times
Wipe dust from the intake vents
Check the power cord for wear
Store indoors when not in use
Keep grass clippings away from the intake
Cleaning the Blower
Unplug the blower.
Wipe the exterior with a damp cloth.
Use a soft brush to clean intake vents.
Never spray water directly into the motor.
When to Replace a Blower
Loud grinding noises
Weak airflow
Overheating
Visible cracks in the housing
Mini Example
If the slide inflates but feels soft, check the blower intake — grass clippings often block airflow.

Seasonal Maintenance
A consistent maintenance rhythm keeps your slide performing like new. Here’s the ideal schedule.
Monthly Maintenance
Inspect seams and anchor loops
Check for small leaks
Clean sprayer lines
Wipe down the slide with mild soap
Dry fully before storing
Mid‑Season Maintenance
(Usually mid‑July)
Deep clean the slide
Inspect the underside for wear
Reinforce any stressed seams
Check blower tube for thinning fabric
Tighten or replace drawstrings
End‑of‑Season Maintenance
(Preparing for winter storage)
Deep clean the entire slide
Remove all mold or mildew
Dry completely — no exceptions
Inspect and patch any damage
Store in a cool, dry place
Keep the blower in a separate dry bin
For long‑term care after repairs, review the Storage Guide for Inflatable Water Slides.
Mini Example
If you store the slide even slightly damp, you’ll find mildew spots by spring — drying is the most important step.
Long‑Term Care & Lifespan Tips
With proper care, a residential inflatable slide can last 5–7 years or more. Here’s how to maximize its lifespan.
Top Long‑Term Care Tips
Always dry before storing
Avoid dragging the slide on concrete
Keep shoes, toys, and pets off the slide
Use all anchor points every time
Store indoors during winter
Avoid direct sunlight during long storage periods
For durability expectations after repairs, see the Inflatable Water Slide Lifespan Guide.
Protecting the Fabric
UV exposure is the #1 cause of fading and fabric weakening.
Use shade when possible
Rotate the slide’s orientation occasionally
Apply UV‑safe fabric protectant (optional)
Mini Example
If your slide sits in full sun all summer, rotate it 180 degrees halfway through the season — this evens out UV exposure.
If you’re comparing durability across categories, start with Best Heavy‑Duty Inflatable Water Slide.
FAQ Block — Repair
How do I fix a seam leak?
Use a seam‑specific repair kit and allow 24 hours to cure.
Can I repair a slide while it’s inflated?
No—deflate fully before patching.
How long do patches last?
A proper vinyl patch can last the life of the slide.