How to Fix Seams, Tears & Holes in Holiday Inflatables (Beginner to Pro Repairs)
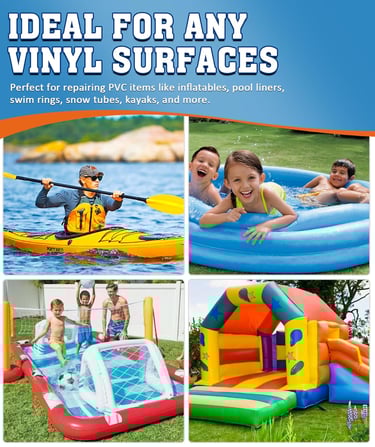
Learn how to repair seams, tears, and holes in holiday inflatables, bounce houses, and commercial inflatables using the right materials and best practice techniques. Includes misconceptions, what not to do, and climate safe repair methods.
By Frank “Frosty” Adminei
3/9/202620 min read


To fix seams, tears, and holes in inflatables, clean the surface, fully deflate the unit, and apply the correct repair method for the material—vinyl, nylon, or PVC. Use patch kits for small punctures, reinforcement tape for seams, and heat‑bond or stitching for larger structural damage.
Overview
Repairing inflatable seams and tears requires matching the fix to the material and the type of damage. Small holes respond well to vinyl patches or adhesive kits, while seam failures often need reinforcement tape or stitching. Larger rips in bounce houses or commercial inflatables may require heat‑bonding or professional repair. This guide covers best practices, what not to do, misconceptions, climate considerations, and repair methods for holiday inflatables, residential units, and commercial‑grade structures.
Introduction
Holiday inflatables, bounce houses, and commercial‑grade units all share one truth: they’re only as strong as their seams and surfaces. A tiny puncture can collapse a Santa, a slow seam leak can ground a bounce house, and a large tear can sideline a commercial inflatable during peak season. The good news? Most damage is repairable when you match the fix to the material, prepare the surface correctly, and avoid the common mistakes that ruin otherwise simple repairs.
As someone who has patched more inflatables than I can count, I’ll walk you through the exact steps I use—from diagnosing the type of damage to choosing the right repair method for vinyl, nylon, PVC, and decorative fabrics. We’ll cover small holes, medium tears, seam failures, and large rips across all inflatable categories. You’ll also see where budget kits work, where premium materials matter, and how climate affects adhesive performance. By the end, you’ll know how to repair your inflatable safely, confidently, and with long‑lasting results.
For a complete troubleshooting framework that pairs with these repair steps, see the Ultimate Guide to Repairing and Troubleshooting Inflatable Decorations.
1. Understanding Inflatable Materials (Vinyl, Nylon, PVC, Oxford Cloth)
Why Material Matters
Inflatables aren’t built from a single universal fabric. Holiday inflatables use thin nylon or Oxford cloth, bounce houses rely on heavy vinyl, and commercial inflatables often use industrial PVC. Each material reacts differently to adhesives, stitching, and reinforcement, which is why choosing the right repair method is essential.
Holiday inflatables tear easily but respond well to lightweight patches and color‑safe adhesives. Vinyl bounce houses are tougher but require stronger bonding agents and multi‑layer reinforcement. Commercial PVC can handle heat‑bonding and industrial stitching, but only when done correctly. Using the wrong method—like vinyl glue on nylon—almost always leads to failure.
How Climate Affects Material Behavior
Cold weather stiffens vinyl and makes nylon brittle, while heat softens adhesives and can cause patches to slide. Humidity slows curing times, and UV exposure weakens fabric over time.
Quick checks before repairing:
Is the material flexible or stiff?
Is the surface warm enough for adhesive to bond?
Is the fabric UV‑faded or weakened?
Mini Example
A homeowner in Minnesota tries to patch a nylon Santa at 25°F. The adhesive never cures, the patch lifts, and the leak returns. Warming the material indoors first would have prevented the failure.
2. How to Diagnose Damage Correctly (Tears, Holes, Seam Failures, Slow Leaks)
Start With a Full Inspection
Before repairing anything, you need to know exactly what you’re dealing with. A small puncture behaves differently from a seam failure, and treating them the same is one of the biggest mistakes beginners make. Inflate the unit fully, listen for hissing, and gently press along seams to reveal hidden leaks.
How to Identify the Type of Damage
Use these quick distinctions:
Small hole or puncture: clean, round, often caused by sticks, pets, or decorations.
Medium tear: jagged edges, usually from wind stress or dragging the inflatable.
Large rip: long, structural, often caused by improper storage or sharp objects.
Seam failure: air escaping along a stitched or heat‑sealed line; requires a different repair method than surface tears.
Slow leak: may require soapy water to reveal bubbles.
Mark, Measure, and Document
Once you find the damage, mark it with painter’s tape or a washable marker. Measure the length of the tear and take a quick photo. This helps you choose the right repair method and ensures you don’t miss secondary leaks—common in older holiday inflatables.
Mini Example
A bounce house operator finds a 3‑inch tear but misses a tiny seam leak nearby. After repairing only the tear, the inflatable still sags. A full inspection would have caught both issues.
For general repair principles that support these techniques, read Best Practice Tips to Repair Your Inflatable Decorations.
3. Best Practices Before Any Repair (Cleaning, Drying, Deflating, Stabilizing)
Why Prep Determines Whether a Repair Holds
Most inflatable repairs fail not because of the patch or adhesive—but because the surface wasn’t prepared correctly. Dust, moisture, cold fabric, and residual dirt all weaken bonding strength, especially on nylon holiday inflatables and heavy vinyl bounce houses. Proper prep ensures the adhesive cures fully and the patch stays flexible through inflation cycles.
Step‑by‑Step Surface Preparation
Before touching any glue or patch, walk through these steps:
Clean the area with mild soap and water to remove dirt and oils.
Rinse and dry completely—even slight moisture prevents adhesion.
Warm the material indoors or with a hair dryer on low if temperatures are below 55°F.
Fully deflate the inflatable so the fabric lies flat and doesn’t stretch during repair.
Stabilize the area using a cutting board, book, or flat surface behind the tear.
These steps apply across all materials—nylon, vinyl, PVC—but the drying time and temperature sensitivity vary. Nylon dries quickly but is sensitive to cold; vinyl holds moisture longer and needs extra time.
Frosty’s Pro Tips for Cold‑Weather Repairs
Living in a cold‑climate region myself, I’ve learned that adhesives behave differently below 50°F. If you’re repairing a holiday inflatable outdoors in late fall or winter:
Bring the inflatable inside for at least 30 minutes before patching.
Warm the adhesive tube in your hands to improve flow.
Let the patch cure indoors overnight before exposing it to cold air.
Mini Example
A homeowner tries to patch a nylon snowman outside on a chilly November evening. The adhesive gels instantly, never bonds, and the patch peels off the next morning. Warming the material indoors would have prevented the failure.
4. How to Repair Small Holes & Punctures (Beginner‑Friendly Methods)
Why Small Holes Are the Easiest Fix
Small punctures—usually under ½ inch—are the most common type of inflatable damage. Pets, yard debris, and holiday decorations often cause these tiny leaks. The good news? They’re also the easiest and most reliable repairs, as long as you use the right adhesive and patch type for the material.
Step‑by‑Step Repair Method
Here’s the simplest, most reliable method for small holes:
Clean and dry the area thoroughly.
Cut a rounded patch (sharp corners peel faster).
Apply adhesive evenly—thin layer for nylon, slightly thicker for vinyl.
Press firmly and smooth out air bubbles.
Let it cure fully (usually 8–24 hours depending on adhesive).
For nylon holiday inflatables, lightweight fabric patches work best. For vinyl bounce houses, use vinyl‑specific patches with stronger bonding agents. PVC patches are ideal for commercial inflatables.
Common Mistakes to Avoid
Using duct tape—it fails within hours.
Applying adhesive too thickly—it never cures properly.
Patching while inflated—the patch will stretch and fail.
Skipping edge sealing—edges lift first, especially in cold weather.
Mini Example
A parent patches a bounce house with a generic craft glue. It holds for 10 minutes before peeling. Switching to a vinyl‑specific adhesive would have created a long‑lasting repair.
5. How to Repair Medium Tears (1–6 Inches)
Why Medium Tears Need Reinforcement
Medium tears fall into the “in‑between” zone—too large for a simple patch, but not big enough to require heat‑bonding or industrial stitching. These tears often occur from wind stress, rough handling, or dragging the inflatable across concrete or frozen ground. The key is to reinforce the area so the tear doesn’t continue to spread once the inflatable is under pressure again.
Step‑by‑Step Repair Method
Medium tears respond best to a layered repair, especially on vinyl and PVC. Here’s the most reliable method:
Clean and dry the area thoroughly.
Round the edges of the tear if frayed (prevents future splitting).
Apply a backing patch inside the inflatable when possible—this stabilizes the tear.
Apply a larger exterior patch with strong adhesive.
Press firmly and smooth edges to prevent lifting.
Allow full cure time—usually 12–24 hours depending on adhesive and temperature.
Holiday inflatables (nylon) may only need a single exterior patch, but bounce houses and commercial inflatables benefit from the two‑layer approach.
When Stitching Is Appropriate
Stitching can help stabilize nylon tears, but it must be done carefully.
Rules for safe stitching:
Use nylon thread, not cotton.
Keep stitches loose enough to avoid fabric puckering.
Always apply a patch over the stitched area to seal air leaks.
Mini Example
A 4‑inch tear on a vinyl bounce house is repaired with only a single exterior patch. Once inflated, the tear spreads under pressure and the patch lifts. Adding an interior backing patch would have prevented the failure.
Vinyl Repair Patch Kit (General Vinyl Repairs)
1. What This Product Is
A heavy‑duty vinyl repair kit designed for medium to large tears in bounce houses and thicker inflatables. It includes vinyl patches, vinyl cement, and application tools.
2. Why It Fits This Repair Scenario
Vinyl bounce houses and commercial inflatables require stronger bonding agents than nylon holiday inflatables. This kit provides the flexibility and durability needed for high‑stress areas.
3. Who It’s Best For
Homeowners repairing bounce houses, parents fixing backyard play inflatables, and small rental operators who need reliable, long‑lasting repairs.
4. Why I Selected It
I’ve used dozens of vinyl kits over the years, and this type consistently provides the strongest bond with the least edge lifting. It’s also forgiving for beginners.
5. Problems It Solves
Tears that reopen under pressure
Adhesives that peel in warm weather
Weak patches that fail during jumping or heavy use
6. Limitations
Not suitable for nylon holiday inflatables or thin decorative fabrics. Requires a full cure time before use.
7. Discovery Fingerprint
Search terms that reliably surface this type of product:
“vinyl inflatable repair kit heavy duty,” “bounce house vinyl patch kit,” “vinyl cement inflatable repair.”
6. How to Repair Large Rips (6+ Inches)
Why Large Rips Require Structural Repair
Large rips are usually caused by improper storage, sharp objects, or high‑stress loading. These tears compromise the structural integrity of the inflatable, especially on bounce houses and commercial units. A simple patch won’t hold—you need a reinforced, multi‑layer repair or a heat‑bonded solution depending on the material.
Heat‑Bonding for PVC and Commercial Inflatables
Commercial inflatables often use PVC, which responds well to heat‑bonding. This method fuses the patch to the base material, creating a strong, flexible bond.
Heat‑bonding basics:
Use a controlled‑temperature heat gun (not a hair dryer).
Apply even heat to activate the bonding layer.
Press firmly with a roller to eliminate air pockets.
Allow cooling time before testing the repair.
This method is not recommended for nylon holiday inflatables—they melt easily.
Multi‑Layer Reinforcement for Vinyl & Nylon
For non‑PVC materials, use a three‑layer reinforcement:
Interior stabilizing patch to prevent spreading.
Exterior primary patch to seal the tear.
Secondary reinforcement patch slightly larger than the first.
This approach distributes stress and prevents the tear from reopening under pressure.
When to Call a Professional
If the rip crosses a load‑bearing seam, or if the inflatable is used commercially (events, rentals, public spaces), a professional repair may be required to maintain safety compliance.
Mini Example
A commercial slide suffers a 10‑inch rip along a high‑stress area. A homeowner attempts a vinyl patch, but the repair fails immediately. A heat‑bonded PVC patch or professional repair would have been the correct approach.
If you want to repurpose or creatively restore older inflatables, check out Innovative Repair and Upcycling Methods for Inflatables.
7. How to Repair Inflatable Seams (The Most Common Failure Point)
Why Seams Fail More Often Than Surfaces
Seams are the structural backbone of any inflatable. They’re stitched, heat‑sealed, or welded depending on the material, and they endure the most stress during inflation. Holiday inflatables often fail at stitched seams, while bounce houses and commercial inflatables fail at heat‑sealed seams when the bond weakens over time. A seam failure is not the same as a tear—it requires a different repair approach.
Step‑by‑Step Seam Repair Method
To repair a seam correctly, you need to stabilize the area and rebuild the bond:
Fully deflate the inflatable so the seam lies flat.
Clean the seam edges to remove dirt and old adhesive.
Apply seam‑specific adhesive (stronger than standard patch glue).
Press the seam together and hold for 1–2 minutes.
Apply a reinforcement strip over the seam to prevent reopening.
Allow full cure time—seam adhesives often require 24 hours.
For nylon holiday inflatables, use lightweight seam tape. For vinyl and PVC, use heavy‑duty seam reinforcement strips.
Reinforcement Strategies That Actually Work
A seam repair is only as strong as its reinforcement.
Effective reinforcement includes:
Interior seam tape to stabilize the bond.
Exterior seam strip to distribute pressure.
Edge sealing to prevent lifting.
Avoid stitching seams unless you know the material can handle it—stitching nylon is fine, stitching vinyl can cause new tears.
Mini Example
A homeowner repairs a seam on a nylon reindeer using a standard patch. It holds for a day, then fails again. Switching to seam‑specific tape and adhesive would have created a flexible, long‑lasting repair.
8. Holiday Inflatables: Repair Methods for Thin Nylon & Decorative Fabrics
Why Holiday Inflatables Need a Different Approach
Holiday inflatables are made from thin nylon or Oxford cloth, often with printed graphics, embroidery, or decorative stitching. These fabrics are lightweight and flexible—but also prone to tearing, fraying, and color damage. Using heavy vinyl patches or strong solvents can ruin the appearance or weaken the fabric.
Best Repair Methods for Nylon & Oxford Cloth
Holiday inflatables respond best to lightweight, flexible repair materials.
Recommended approach:
Use fabric‑safe adhesive designed for nylon.
Cut a thin, rounded patch that matches the fabric weight.
Avoid thick vinyl patches—they create stiff spots that tear again.
Seal edges lightly to prevent fraying.
Match patch color when possible to preserve appearance.
For seams, use nylon seam tape rather than vinyl reinforcement strips.
Protecting Printed Graphics & Decorative Areas
Printed graphics can smear or fade if exposed to harsh adhesives.
Safe practices include:
Testing adhesive on a hidden area first.
Using clear nylon patches over printed sections.
Avoiding heat‑based repairs—nylon melts quickly.
Mini Example
A homeowner patches a Santa inflatable with a thick vinyl patch. The patch holds, but the surrounding nylon tears within a week because the stiff vinyl created a stress point. A thin nylon patch would have flexed with the fabric and prevented the secondary tear.
Product Module 2 — Nylon Fabric Repair Kit (Holiday Inflatables)
1. What This Product Is
A lightweight nylon repair kit designed for thin holiday inflatables, including Santa, snowmen, and character displays.
2. Why It Fits This Repair Scenario
Holiday inflatables use thin nylon that can’t handle heavy vinyl adhesives. This kit provides flexible, color‑safe patches that blend with decorative fabrics.
3. Who It’s Best For
Homeowners repairing seasonal displays, beginners, and anyone working with printed or embroidered nylon.
4. Why I Selected It
It’s one of the few repair kits that doesn’t stiffen nylon or cause discoloration. The adhesive is gentle but effective.
5. Problems It Solves
Fraying nylon edges
Color damage from harsh adhesives
Patches that peel in cold weather
6. Limitations
Not suitable for vinyl or PVC. Not strong enough for bounce houses.
7. Discovery Fingerprint
“nylon inflatable repair kit,” “holiday inflatable patch kit,” “nylon fabric adhesive clear patch.”
9. Residential Bounce Houses: Repair Methods for Heavy Vinyl
Why Bounce House Vinyl Requires Stronger Repairs
Residential bounce houses are built from thick, multi‑layer vinyl designed to handle weight, movement, and repeated stress. This material is far more durable than holiday inflatable nylon, but when it tears, the damage tends to spread quickly. Vinyl also requires stronger adhesives, larger patches, and longer cure times because of its weight and rigidity.
Best Repair Methods for Vinyl Bounce Houses
Vinyl repairs rely on heavy‑duty adhesives and multi‑layer patching. A single lightweight patch won’t hold under the pressure of kids jumping.
Most reliable method:
Clean thoroughly—vinyl holds oils and dirt more than nylon.
Use vinyl‑specific adhesive—general fabric glue won’t bond.
Apply an interior stabilizing patch whenever possible.
Add a large exterior patch with rounded edges.
Roll out air bubbles using a small roller or spoon.
Allow a full 24‑hour cure before reinflating.
Vinyl repairs are all about strength and flexibility. The patch must move with the material without creating stiff points that tear again.
Safety Considerations for Families
Because bounce houses are used by children, repairs must be structurally sound.
Avoid:
Using temporary tape fixes
Allowing kids to jump before the adhesive fully cures
Ignoring seam failures—these are load‑bearing
Mini Example
A parent patches a bounce house with a nylon patch kit. It sticks at first, but once kids start jumping, the patch tears away. Switching to a vinyl‑specific kit would have created a durable, flexible repair.
10. Commercial‑Grade Inflatables: Industrial Repair Techniques
Why Commercial Units Need Professional‑Level Repairs
Commercial inflatables—slides, obstacle courses, event rentals—are built from industrial PVC or multi‑layer vinyl. These materials are designed for heavy use, high load, and long operational hours. When they tear, the damage often affects structural integrity, meaning repairs must be stronger, thicker, and more precise than residential fixes.
PVC Welding & Heat‑Bonding
Commercial PVC responds extremely well to heat‑bonding, which creates a fused, permanent repair.
Heat‑bonding basics:
Use a temperature‑controlled heat gun (not a household dryer).
Apply heat evenly to activate the PVC bonding layer.
Press firmly with a roller to eliminate air pockets.
Allow the patch to cool fully before testing.
This method produces a repair that’s often stronger than the original material.
Industrial Stitching for Load‑Bearing Areas
Some commercial inflatables use stitching in high‑stress zones. When these areas fail, stitching may be required before patching.
Rules for safe stitching:
Use heavy‑duty polyester thread
Keep stitches evenly spaced
Avoid overtightening—this causes puckering and new tears
Always apply a patch over the stitched area
When Professional Repair Is the Best Option
Commercial inflatables used for events or rentals must meet safety standards.
Call a professional when:
The tear crosses a load‑bearing seam
The rip exceeds 12 inches
The inflatable is used in public or commercial settings
Heat‑bonding equipment is unavailable
Mini Example
A rental company attempts to patch a 14‑inch rip on a commercial slide using a vinyl patch kit. The repair fails during an event. A heat‑bonded PVC repair or professional service would have been the correct approach.
Product Module 3 — PVC Heat‑Bond Repair Kit (Commercial Inflatables)
1. What This Product Is
A PVC heat‑bond repair kit designed for industrial inflatables, including slides, obstacle courses, and rental units.
2. Why It Fits This Repair Scenario
Commercial inflatables use PVC that responds best to heat‑activated bonding. This kit provides a permanent, fused repair.
3. Who It’s Best For
Rental operators, event companies, and owners of commercial‑grade inflatables.
4. Why I Selected It
Heat‑bonding produces the strongest repair possible—often stronger than the original PVC.
5. Problems It Solves
Large rips
Load‑bearing seam failures
High‑stress structural tears
6. Limitations
Not safe for nylon or thin vinyl. Requires careful temperature control.
7. Discovery Fingerprint
“PVC heat bond inflatable repair,” “commercial inflatable PVC patch,” “PVC welding repair kit.”
11. Budget vs Premium Repair Options
Why Repair Quality Depends on Materials
Inflatable repairs can be done on almost any budget, but the durability of the repair depends heavily on the quality of the adhesive, patch material, and reinforcement method. Budget kits work well for small holes and light‑duty holiday inflatables, but bounce houses and commercial units demand premium materials to withstand pressure, weight, and repeated use.
Budget Repair Options (When They Work)
Budget kits are perfectly fine for:
Small punctures in holiday inflatables
Light nylon tears under 2 inches
Temporary fixes during the season
Cosmetic repairs on non‑load‑bearing areas
Budget kits typically include thin nylon patches and general‑purpose adhesive. These are flexible and easy to use but not strong enough for vinyl or PVC.
Premium Repair Options (When They’re Necessary)
Premium kits include vinyl‑specific adhesives, PVC patches, seam reinforcement strips, and industrial bonding agents. These are essential for:
Bounce houses
Commercial inflatables
Large tears
Seam failures
High‑stress areas
Premium materials cost more, but they create repairs that last for years instead of weeks.
Cost‑to‑Longevity Comparison
Budget repair: inexpensive, quick, lasts 1–3 months
Mid‑grade repair: moderate cost, lasts 6–12 months
Premium repair: higher cost, lasts 1–3 years or more
Mini Example
A homeowner uses a budget nylon patch on a vinyl bounce house. It sticks at first but fails during the next use. A premium vinyl‑specific kit would have bonded properly and prevented the secondary tear.
12. Common Misconceptions About Inflatable Repairs
Misconception #1: “Duct Tape Fixes Everything”
Duct tape is one of the worst things you can use on an inflatable. It loses adhesion quickly, leaves residue, and creates stiff edges that cause new tears. It’s fine as a temporary emergency fix, but never as a permanent solution.
Misconception #2: “Any Glue Works”
Adhesives are material‑specific.
Nylon needs fabric‑safe adhesive
Vinyl needs vinyl cement
PVC needs PVC bonding agents or heat‑bonding
Using the wrong glue leads to peeling, bubbling, and failed repairs.
Misconception #3: “You Can Patch While Inflated”
Patching while inflated stretches the fabric and prevents the adhesive from bonding. The patch will lift as soon as the inflatable deflates or reinflates. Always repair on a fully deflated, flat surface.
Misconception #4: “Bigger Patches Are Always Better”
Oversized patches create stiff spots that tear again. The patch should be just large enough to cover the damage with rounded edges.
Misconception #5: “Heat Repairs Work on All Materials”
Heat‑bonding is only safe for PVC and some heavy vinyl. Nylon holiday inflatables will melt instantly under heat.
Mini Example
A homeowner tries to heat‑bond a nylon snowman using a heat gun. The fabric shrivels immediately. Nylon requires fabric‑safe adhesive and lightweight patches—not heat.
13. What NOT to Do (Mistakes That Ruin Inflatables)
Avoid These Common Repair Mistakes
Even well‑intentioned repairs can cause more harm than good. Many inflatable failures come from using the wrong materials, rushing the repair, or applying techniques meant for a different fabric. These mistakes often turn a small, easy fix into a larger tear or a permanent weak spot.
The Most Damaging Mistakes
Here are the errors I see most often when helping homeowners and operators troubleshoot failed repairs:
Using duct tape — It peels, leaves residue, and causes new tears.
Applying adhesive too thickly — Thick glue never cures and weakens the patch.
Repairing while inflated — The fabric stretches, preventing proper bonding.
Using vinyl patches on nylon — Creates stiff spots that tear again.
Skipping surface prep — Dirt, oils, and moisture destroy adhesion.
Overheating nylon — Heat guns melt decorative holiday inflatables instantly.
Stitching vinyl — The needle holes create new tear points.
Why Rushing Repairs Leads to Failure
Inflatables need full cure time before reinflation. Even if the patch feels dry, the adhesive underneath may still be soft. Reinflating too soon stretches the bond and causes early failure. I always tell people: “If you’re not sure, give it another hour.”
Mini Example
A homeowner patches a nylon Santa and reinflates it after 30 minutes. The patch lifts immediately because the adhesive needed at least 8 hours to cure. Waiting overnight would have ensured a strong bond.
14. Climate & Seasonal Repair Considerations
Why Weather Conditions Affect Repair Success
Inflatable repairs behave differently depending on temperature, humidity, and UV exposure. Cold weather stiffens vinyl and slows adhesive curing, while heat softens glue and can cause patches to slide. Humidity affects drying times, and UV exposure weakens fabric over time. Repairing without considering climate often leads to premature failure.
Cold‑Weather Repair Tips
Cold climates—especially northern states—require extra care:
Warm the inflatable indoors before patching.
Keep adhesive at room temperature.
Allow extended cure times (12–24 hours).
Avoid outdoor repairs below 50°F.
Holiday inflatables are especially vulnerable because nylon becomes brittle in cold air.
Hot‑Weather & High‑Humidity Considerations
In warm or humid climates:
Work in shade to prevent adhesive from softening.
Avoid applying patches to overheated vinyl.
Expect longer drying times in high humidity.
Store inflatables away from direct sunlight to prevent UV degradation.
Seasonal Wear Patterns
Fall/Winter: holiday inflatables face wind stress, cold brittleness, and moisture.
Spring/Summer: bounce houses face heat, UV exposure, and heavy load stress.
Year‑round commercial units: consistent wear on seams and load‑bearing areas.
Mini Example
A family in Florida patches a bounce house in direct sunlight. The vinyl becomes too warm, the adhesive softens, and the patch slides out of place. Moving the repair to a shaded area would have ensured proper bonding.
15. Troubleshooting: When a Repair Isn’t Holding
Why Some Repairs Fail Even When You Follow the Steps
Even a well‑executed repair can fail if the underlying issue wasn’t addressed. Sometimes the tear spreads, the adhesive doesn’t cure correctly, or a hidden leak nearby reduces pressure and makes the repair appear faulty. Troubleshooting is about identifying the real cause—not just re‑patching the same spot.
Common Reasons Repairs Don’t Hold
Here are the issues I see most often when people reach out for help:
Adhesive failure due to cold temperatures or moisture
Patch lifting because edges weren’t sealed or rounded
Hidden secondary leaks that reduce internal pressure
Wrong adhesive for the material (vinyl glue on nylon, etc.)
Inflating too soon before the adhesive fully cures
Structural stress on load‑bearing seams
Holiday inflatables often fail due to cold‑weather curing issues, while bounce houses fail from stress and weight.
How to Diagnose a Failed Repair
Use this quick process:
Check patch edges for lifting or bubbling
Press around the area to feel for escaping air
Use soapy water to reveal micro‑leaks
Inspect seams nearby—tears often spread along stitching
Check for fabric stiffness (a sign of incompatible adhesive)
Mini Example
A homeowner patches a medium tear on a vinyl bounce house. The patch lifts after the first use. The real issue? A hidden seam leak nearby reduced pressure and caused the patch to flex excessively. Fixing the seam first would have stabilized the area.
16. Long‑Term Maintenance to Prevent Future Tears
Why Prevention Saves Time, Money, and Headaches
Most inflatable damage is preventable with simple maintenance habits. Whether you’re storing holiday inflatables for the season or running a bounce house every weekend, proper care dramatically reduces tears, seam failures, and fabric fatigue. A few minutes of maintenance can extend the life of your inflatable by years.
Seasonal Cleaning & Inspection
Before storing or setting up your inflatable, run through these checks:
Clean the surface with mild soap to remove dirt and debris
Dry completely to prevent mold and fabric weakening
Inspect seams for early signs of stress
Check high‑wear areas like corners, tie‑downs, and blower ports
Look for UV fading which indicates weakened fabric
Holiday inflatables often fail from moisture and cold‑weather brittleness, while bounce houses fail from UV exposure and load stress.
Proper Storage Techniques
Good storage prevents 80% of long‑term damage.
Best practices include:
Store indoors in a cool, dry place
Avoid folding along the same lines every season
Use breathable storage bags instead of airtight bins
Keep away from sharp objects and heavy items that can compress fabric
Routine Maintenance for Heavy‑Use Inflatables
Bounce houses and commercial units need more frequent care:
Weekly seam inspections during peak season
Monthly deep cleaning to remove oils and dirt
Quarterly patch reinforcement on high‑stress zones
Annual professional inspection for commercial units
Mini Example
A rental operator stores inflatables in a hot garage. Over time, the vinyl becomes brittle and seams weaken. Moving storage to a climate‑controlled area would have prevented the degradation.
17. Safety Notes for Families, Events & Commercial Operators
Why Safety Must Guide Every Repair
Inflatables are fun, but they’re also load‑bearing structures that rely on airtight seams and stable surfaces to stay upright. A weak repair can lead to sudden collapse, tripping hazards, or unsafe pressure levels—especially in bounce houses and commercial units. Whether you’re setting up a holiday display or running a rental business, safety should always be the first checkpoint.
Key Safety Practices for Homeowners
Holiday inflatables may seem harmless, but they still require safe operation:
Inspect seams and tie‑downs before every setup.
Avoid overinflation—it stresses repaired areas.
Keep inflatables away from sharp decorations like metal stakes or wire frames.
Monitor wind conditions—gusts can worsen existing tears.
A small seam leak in a holiday inflatable won’t cause major danger, but it can lead to rapid deflation that damages the blower or fabric.
Safety for Bounce Houses & Residential Play Units
Bounce houses carry real load stress. Repairs must be structurally sound before kids use them.
Always:
Check repaired areas for lifting edges.
Reinforce seams in high‑stress zones.
Keep the blower running continuously—pressure drops strain repairs.
Avoid use until adhesives have fully cured.
Commercial Operator Safety Requirements
Commercial inflatables used at events or rentals must meet higher standards:
Daily inspections of seams, tie‑downs, and repaired areas
Documented repair logs for liability protection
Professional repair for large rips or load‑bearing seams
Compliance with local safety regulations
Mini Example
A rental operator reinflates a slide before the seam reinforcement has cured. Under load, the seam fails and the slide partially collapses. Allowing full cure time and performing a stress test would have prevented the incident.
18. FAQs (7 Questions Based on PAA Research)
1. Can you repair an inflatable without deflating it?
No. Repairs must be done on a fully deflated, flat surface so the adhesive bonds correctly. Patching while inflated causes stretching and early failure.
2. What’s the best glue for inflatable repairs?
It depends on the material:
Nylon: fabric‑safe adhesive
Vinyl: vinyl cement
PVC: PVC bonding agent or heat‑bonding
Using the wrong adhesive is the #1 cause of failed repairs.
3. How long should a patch cure before reinflating?
Most adhesives require 8–24 hours. Cold weather extends cure time. When in doubt, wait overnight.
4. Can you stitch a tear instead of patching it?
Stitching works for nylon holiday inflatables, but vinyl and PVC should not be stitched. Always apply a patch over stitching to seal air leaks.
5. Why does my inflatable still sag after patching a hole?
You may have a secondary leak, often along a seam. Use soapy water to check for bubbles around nearby areas.
6. Are heat‑based repairs safe for all inflatables?
No. Heat‑bonding is only safe for PVC and some heavy vinyl. Nylon holiday inflatables will melt instantly.
7. What’s the best way to prevent future tears?
Regular maintenance:
Clean and dry before storage
Inspect seams seasonally
Store in a cool, dry place
Avoid folding along the same lines every year
Conclusion
Bringing Your Inflatable Back to Life the Right Way
Repairing seams, tears, and holes in inflatables isn’t complicated once you understand the material, choose the right adhesive, and follow proper prep steps. Whether you’re fixing a thin nylon holiday inflatable or reinforcing a heavy vinyl bounce house, the same principle applies: match the repair to the damage and the fabric, not the other way around. With the right approach, even large rips and seam failures can be restored to safe, long‑lasting condition.
Why Method Matters More Than the Size of the Damage
A small puncture repaired with the wrong glue will fail faster than a large rip repaired correctly. That’s why this guide focused on material‑specific techniques, climate considerations, and reinforcement strategies—the details that make the difference between a patch that lasts a day and one that lasts a season (or several). When in doubt, slow down, prep the surface well, and give the adhesive time to cure. Most repair failures come from rushing.
A Final Word From Frosty
I’ve repaired lots of inflatables over the years, and the biggest lesson is this: a careful repair is always cheaper than a replacement. With the right tools and a little patience, you can keep your holiday displays glowing, your bounce houses running safely, and your commercial units performing season after season. Take your time, follow the steps, and your inflatable will be back in action before you know it.