Top Tips for Setting Up Inflatable Holiday Decorations
Learn how to properly anchor outdoor holiday inflatables with expert tips, safety advice, and the best accessories to keep your decorations secure and festive all season.
SETUP AND MAINTENANCE
Frank Adminei
5/8/202416 min read
FAQ: Outdoor Inflatable Decorations Setup
Q1: How do I prevent my inflatable from tipping over or blowing away in the wind?
A1: Anchoring is key! Use heavy-duty ground stakes, sandbags, or cinder blocks instead of the flimsy plastic stakes that come in the box. Always reinforce anchors especially for large inflatables or in windy conditions. Checking the weather forecast and taking your inflatables down during storms also helps keep them safe and secure.
Q2: Can I use any pump or helium to inflate my decorations?
A2: No, you should only use the built-in blower motor that comes with your inflatable. Helium or bike pumps won’t work properly and can damage the inflatable. The blower is designed to keep the inflatable properly inflated and safe.
Q3: What are the best practices for storing inflatables after the season?
A3: Make sure your inflatable is completely dry before storage to avoid mildew. Fold it loosely, avoid sharp creases, and store it in a breathable or airtight container in a cool, dry place. Proper storage helps keep your inflatable in great shape for many seasons.

Introduction
Outdoor inflatable decorations are the kind of thing that turn heads—literally. One minute your yard’s just a yard. The next? It’s a full-on Halloween haunt, a 4th of July blowout, or a whimsical welcome for spring.
I’ve been decorating with inflatables year-round for nearly a decade now, and I’ll tell you straight: nothing gets more smiles from neighbors or questions from strangers. But as fun as they are, these towering, blinking, bouncing creations don’t just set themselves up. And trust me, skipping the setup details—like proper placement, anchoring, power management, and choosing the right accessories—can turn your cheerful display into a sagging eyesore or worse, a backyard hazard.
Real-World Setup Tips (and the Mistakes I Swear I’ll Never Make Again)
Inflatable decorations aren’t just oversized yard toys—they're crowd-pleasers, memory-makers, and in some cases, investments. But for all their joy and charm, one misstep in setup can turn your showstopper into a sad, slumped mess on the lawn. Here’s what I’ve learned—some of it the hard way.
1. Surface Matters More Than You Think
You’d be surprised how many people (my past self included) plop their inflatable on whatever patch of grass seems convenient. But uneven ground, roots, gravel, or hidden slopes? Total setup saboteurs.
Flat, level ground gives your inflatable the structure it needs to inflate properly and stay put.
Avoid areas with rocks or sticks—they can tear the base over time.
Sloped surfaces might seem fine at first… until your snowman starts leaning like he’s had one too many eggnogs.
Lesson learned: My 8-foot Halloween dragon deflated in front of trick-or-treaters one year—because I didn't notice the ground was sloped. Embarrassing and avoidable.
2. Don’t Ignore the Weather—It Never Ignores You
This is a big one. I used to assume that once an inflatable was anchored, it could withstand just about anything. Yeah… no.
High winds? Your inflatable can act like a sail and lift off.
Heavy rain? It can pool inside or weigh down the seams.
Ice? It freezes the fabric and can crack it like brittle plastic.
Now, I treat inflatables like patio furniture—I check the forecast and take them down if a storm’s rolling in. It's a pain, yes, but it beats pulling a soggy Santa out of the neighbor’s hedge.
Pro tip: If you live in a windy area, consider using a weather monitoring app and set alerts. I use Windy.com to keep tabs.
3. Trust the Manual—Mostly
Look, I don’t love reading manuals either. But those setup instructions? They’ve saved me more than once.
Overinflating weakens seams.
Underinflating makes them flop around like deflated balloons at a birthday party no one showed up to.
Running the fan motor 24/7 without a break? That’s a shortcut to burnout—literally.
And when it comes to storage, don’t just shove the inflatable in a bin and hope for the best. Fold it loosely, avoid sharp creases, and keep it in a breathable bag. Stiff vinyl can crack, and those cracks won’t be fixable with a dollar store patch kit.
4. Upgrade Your Anchoring Game
You know those little plastic stakes that come in the box? They’re basically a polite suggestion—not a real solution.
For small inflatables, they’re fine if the weather’s calm.
For anything larger—or if there’s even a whisper of wind—I go with:
Heavy-duty ground stakes
Sandbags (especially good for setups on concrete)
Cinder blocks hidden under decorative covers
Want to avoid that gut-dropping moment when your inflatable collapses during a party? Reinforce everything like you’re prepping for a backyard hurricane. You’ll thank yourself later.
5. Watch for Hazards—Inflatables Have Enemies
Inflatables may seem indestructible, but they’re really just big balloons with fans. That means they hate:
Tree branches
Hot lights
Fire pits
Curious pets
Random extension cords
BBQ grills (ask me how I know)
One holiday, I had a turkey inflatable melt because I thought it was “far enough” from the grill. It wasn’t. Now I treat the area around each inflatable like a no-go zone for heat, claws, and sharp corners.
Safety reminder: Keep all electrical cords and blowers rated for outdoor use. Look for UL-listed options and always plug into a GFCI outlet. CPSC guidelines are a great resource for avoiding electrical hazards.
Final Thoughts: Your Setup Is the Story
Setting up an outdoor inflatable isn’t just about plugging something in—it’s a ritual. It’s the beginning of the holiday mood, a neighborhood signal, sometimes even a little act of art.
But that magic only lasts if you put in the groundwork (literally). Choose the right spot. Anchor it well. Check the weather. Respect the power source. And if something goes wrong—laugh, learn, and do it better next time.
Every season, I get a little more dialed in. Fewer surprises. Better displays. More compliments.
And that? Makes every zip tie, sandbag, and extension cord absolutely worth it.

Best Practices for Setting Up Outdoor Inflatables (Without Losing Your Sanity)
Inflatable decorations aren’t just ornaments—they’re big, bold statements. Whether you’re going all out for Halloween, Valentine’s Day, the Fourth of July, or just creating backyard fun, getting your setup right makes the difference between “Wow!” and “What were they thinking?”
Here’s what I’ve learned after years of testing, tweaking, and—yes—untangling way too many extension cords in the freezing cold.
1. Plan Ahead Like a Pro (Not in the Dark the Night Before)
I used to wing it. I'd open the box, toss the inflatable on the lawn, and plug it in. It always looked easy—until it wasn’t.
Let me tell you, nothing deflates your excitement (pun intended) faster than realizing:
The dragon’s tail is poking through the neighbor’s fence
You’ve overloaded your outlet
Or worse—someone trips over a tangled extension cord during your backyard barbecue
Now I measure the space first. I walk the layout with a tape measure. I sketch the setup (yes, seriously) and test every plug, splitter, and GFCI outlet with a nightlight or tester plug. It takes 15 minutes max—but prevents hours of swearing later.
And don’t even think about using indoor-rated cords. Always go for UL-listed, outdoor-safe extension cords and cord covers where people walk. The Consumer Product Safety Commission has some great safety tips if you want to nerd out like I did.
2. Design With Intention—Not Just Excitement
We’ve all seen those yards that look like the inflatables were set up by a leaf blower. Too much. Too cramped. Too random.
I’ve been guilty of that too—buying five inflatables on impulse and realizing I had nowhere to put them. One year, my Santa was so jammed up against the snowman that it looked like they were fighting over yard space.
Now I design a theme. Not rigidly, but with intention. A spooky graveyard? Great. A romantic garden full of hearts? Awesome. But no more snowman next to Frankenstein. I try to:
Space out inflatables by size, so they don’t compete visually
Balance tall vs. wide pieces
Create visual flow with added lights, signage, or themed accents
It’s like setting a stage. You want your yard to feel like a story, not a warehouse clearance aisle.
3. Make Routine Checks Part of Your Setup Ritual
I learned this the hard way. A tiny tear in the corner of a Halloween ghost went unnoticed—until a breeze turned it into a sagging pile of fabric halfway through October.
Now I check my inflatables weekly:
Any seam stress or tiny holes? Patch it now, not later.
Is the blower motor quiet and steady? If it’s growling or sputtering, it might be choking on leaves.
Are the zippers fully closed? Yes, inflatables have zippers (usually near the base)—and yes, leaving them open will ruin your setup.
And for the love of seasonal joy, clean them. A damp cloth with mild soap goes a long way. No one wants to see last spring’s pollen on your summer flamingo.
4. Store Them Like They're Priceless Artifacts
After the season ends, it’s tempting to wad everything up and shove it in the garage. But that’s the fastest way to ruin an inflatable before next year even starts.
Here’s my method:
Dry them completely—I once stored one damp, and the mildew was unforgiving
Fold loosely—never cram
Use airtight plastic bins—bonus points if you label them by occasion
Avoid heat, pests, and moisture—I store mine on shelving in a dry basement, not the attic
Think of it like storing a parachute. If you pack it with care, it’ll perform perfectly next time. If you don’t? Well... hope you like surprises.
Final Thoughts: Go Big, But Go Smart
Inflatables are joyful, eye-catching, and just plain fun. But like anything that plugs in, blows up, and sits outside in unpredictable weather, they need a little love to do their job well.
With a little planning, some creative thinking, and ongoing TLC, your display won’t just survive the season—it’ll own it. And whether you’re lighting up the yard for a holiday, a party, or just to make your neighbors smile, the effort always pays off.
I’ve made every mistake in the book. But now? My setups are smoother, safer, and way more satisfying. And every time a kid stops to stare—or someone honks in approval—I know it was worth every sandbag and zip tie.
Worst Ideas: 13 Mistakes I’ll Never Make Again With Inflatables (So You Don’t Have To)
Let’s be honest—half of becoming a good inflatable decorator is just surviving your own bad decisions.
I’ve scorched motors, lost Santa to a gust of wind, and once watched a 10-foot snowman faceplant into a flower bed. Some of these lessons I learned the hard way—others I watched unfold in my neighbor’s yard from the comfort of my porch.
So if you’re just starting out (or still recovering from last year’s inflatable fiasco), here are 13 no-go zones to help you avoid turning your holiday setup into a blooper reel.
1. Improvised Anchors: Don’t DIY Disaster
Duct tape. Bricks. Garden ties. I’ve tried it all in a pinch—and regretted it every time.
One windy December, I thought I could secure my penguin with fishing line and a flower pot. I woke up to find him three houses down, slumped over someone’s mailbox like he’d lost all hope. The fix? Use the tethers, stakes, or weighted anchors that come with your inflatable. Or upgrade to sandbags. Just don’t MacGyver it.
2. Inflating with Helium or Random Pumps? Nope.
Let’s just say I had a moment. I thought it’d be “funny” to use helium on a small Santa. Spoiler alert: it was funny—until he floated into a tree.
And don't grab the bike pump either. These inflatables are engineered to work with their built-in blower motors. Using the wrong tool can make them lumpy, overinflated, or downright dangerous. Just use the fan that came in the box. It's there for a reason.
3. Indoor Inflatables Don’t Belong Outside (and Vice Versa)
I once let a tiny indoor reindeer brave the elements because he “looked waterproof.” He wasn’t.
Outdoor inflatables are made to resist wind and moisture. Indoor ones? Not so much. They’ll melt, short, or mold faster than you can say “bad idea.” Check the tag. If it doesn’t say “outdoor rated,” don’t risk it.
4. Don’t Set Up Near Gutters or Drainage Spots
Even a drizzle can wreck your display if it’s too close to a downspout or gutter runoff. Ask me how I know.
After a mild winter rain, my entire Christmas train was soaking in a puddle like a forgotten pool float. Lesson learned: always choose a flat, well-drained area for setup—and avoid anything that channels water.
5. Running Cords Across Walkways = Trip-and-Fall Lawsuit Waiting to Happen
Cords across driveways or walk paths are a no-go. I once watched my aunt take out two snowmen and a candy cane arch because I didn’t think to reroute an extension cord.
Now I bury cords slightly under mulch or grass and use cord covers. Pro tip: use outdoor-rated, weatherproof ones with built-in cable guides. It’s safer and looks neater.
6. Ignore Overhead Hazards at Your Peril
Tree branches, gutters, hanging lights—if it's above your inflatable, it can become a problem.
A few years ago, I underestimated the sway radius of a tall nutcracker. A storm blew through, and he ended up tangled in the oak tree like a hostage. Now I always measure vertical clearance, not just width.
7. Using Weak Anchors on Big Inflatables? Big Mistake
If you’re going to display something over 8 feet tall, don't assume the standard plastic stakes are enough.
High winds will test your anchors like it’s a physics experiment. Use heavy-duty ground stakes or weigh it down with serious sandbags. Trust me—it’s better than chasing Rudolph down the street at 2 a.m.
8. Leaving Them Up While You're Away? Recipe for Chaos
Inflatables and unsupervised weather don’t mix. I once left for a weekend and came back to find my whole yard looked like a battlefield of nylon casualties.
If you’re leaving for more than a day, deflate and store them. Don’t leave them flapping in the wind or soaking in rain just because they look cute.
9. Overcrowding Your Display Is a Rookie Move
I know it’s tempting to show off every inflatable you’ve ever owned, but cramming them all together just creates visual noise.
Plus, it makes repairs, anchoring, and airflow harder. Pick a few bold pieces, space them out, and let them breathe. It’s not a contest—it’s a vibe.
10. Not Testing Before Setup = Future Tears
Every single time I skip the pre-check, something breaks after setup. Every. Time.
Now I test each inflatable before staking anything down. Check for leaks, broken lights, fan noise, and zipper closures. Ten minutes now saves an hour (and a lot of cursing) later.
11. Same Layout, Every Year? Snooze Fest
I used to set everything up in the same exact spots, year after year. Eventually, even the neighborhood kids stopped commenting.
Now I rotate positions, swap pieces, or introduce new themes—sometimes just rearranging gives your display fresh energy. Keeps it exciting for you and your audience.
12. Sharp Edges Will Wreck Your Fabric
Edges of stone planters, metal stakes, or even jagged mulch can tear an inflatable fast.
I ruined a brand-new ghost by letting it sit too close to a rose bush. Keep a buffer zone between the inflatable and anything pointy. Use pavers or mulch borders if you need to, but give them some breathing room.
13. Leaving Inflatables On Overnight Unchecked? Risky.
It’s tempting to just leave them running all night—but fans can overheat, lights can burn out, and electrical problems can snowball. Literally.
I use smart plugs with timers so everything turns off automatically while I sleep. Peace of mind and lower energy bills? Yes, please.
Must-Have Accessories to Elevate Your Inflatable Display
Inflatable decorations are a blast on their own, but adding the right accessories can turn a simple setup into a jaw-dropping holiday spectacle. Whether you want convenience, creativity, or just some extra flair, these must-have accessories will seriously upgrade your inflatable game.
1. Timers: Set It and Forget It
Timers are honestly a game-changer. After a long day, I love coming home to see my display magically lit up without me having to lift a finger. Setting inflatables to turn on at dusk and off at dawn saves energy, time, and sanity—plus your electricity bill will be happier too. Some timers even sync with holiday lights or music, giving your display that perfectly coordinated wow factor.
2. Remote Controls: Convenience at Your Fingertips
No more trudging through the cold to adjust your decorations! Remote controls let you change settings from the comfort of your couch—switch lighting modes, adjust brightness, or turn sounds on and off without stepping outside. For bigger setups, this is pure luxury. I especially love late-night tweaks when it feels like I’m running a high-tech light show.
3. Sensors: Surprise and Efficiency
Motion sensors add a fun surprise element—imagine your inflatable snowman waving hello as neighbors walk by. They also help save energy by activating decorations only when people are around. For busy streets or driveways, sensors grab attention without wasting power.
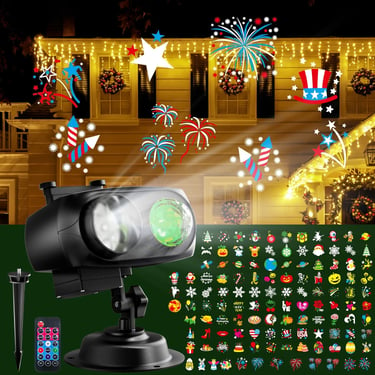
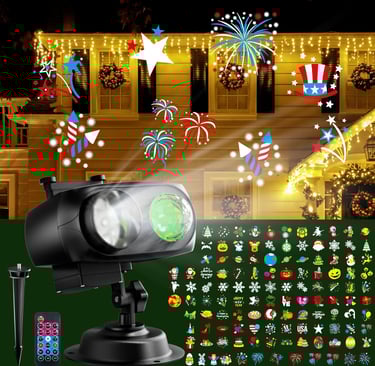
4. Projectors: Dynamic Visuals
Ready to wow your neighborhood? Projectors can shine snowflakes, messages, or animations right onto your inflatables, turning them into interactive stars of the show. Want a Santa who changes colors or a spooky ghost that glows? Projectors make it possible without buying a whole new set of decorations.
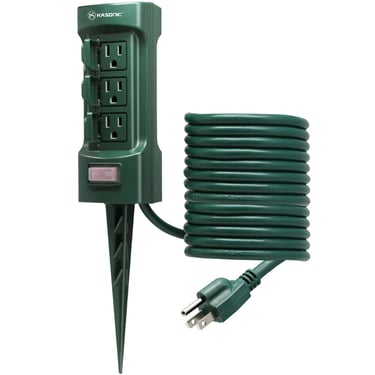
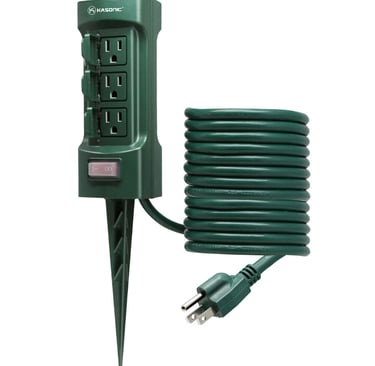
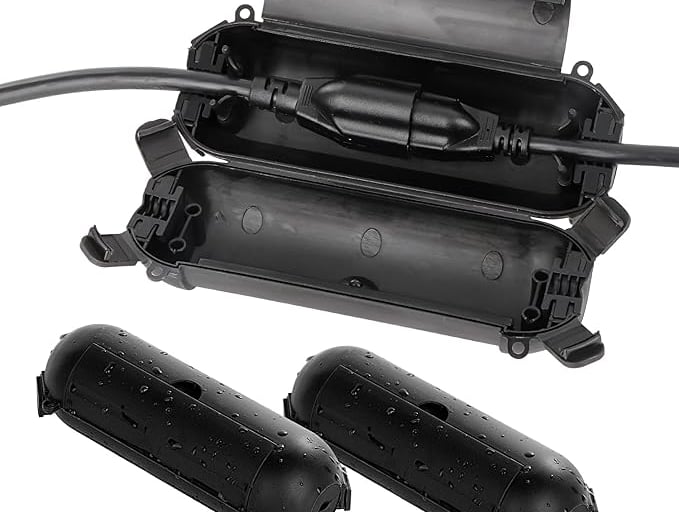
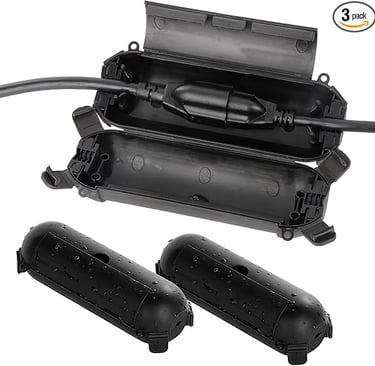
5. Power Splitters and Weatherproof Covers
These might not be flashy, but they’re essential for keeping your power organized and safe. Power splitters let you plug multiple inflatables into one outlet, while weatherproof covers protect cords from rain, snow, and curious critters. Trust me—no one wants to deal with soggy plugs or a tangled mess.
6. Ground Displays and Decorative Bases
Want that polished, “I planned this” look? Adding themed ground displays—like fake snow under a snowman or cobblestones beneath a Victorian scene—gives your setup depth and charm. It’s a small detail that makes a big difference.
7. Bluetooth Speakers for Audio Enhancements
If your inflatables don’t come with sound, adding a Bluetooth speaker nearby is a total game-changer. Sync holiday jingles, spooky sounds, or cheerful tunes for a multisensory experience. Music instantly turns your display from “nice” to “immersive.”
8. Heavy-Duty Anchors and Tethers
If you live somewhere windy or rainy, upgrade your stakes and anchors. The ones that come with inflatables usually work fine in calm weather but can fail when storms roll in. Heavy-duty stakes, bungee cords, or weighted anchors like sandbags keep everything stable and looking professional.
9. Spotlight and Uplighting Kits
Spotlights and uplights can really make your inflatables pop at night. Solar-powered or LED landscape lights focused on key pieces create drama and draw the eye. Colored lights matched to your theme? Instant ambiance.
10. Inflatable Repair Kits
Accidents happen, and having a repair kit ready saves a lot of headaches. These kits include patches, glue, seam sealers, and sometimes replacement fans or lights—so you can fix small tears or leaks quickly without taking down your whole display.
11. Themed Sound Modules
For inflatables without built-in audio, standalone sound modules add fun festive or spooky sounds. It’s a great way to bring your display to life, especially if you have motion or interactive pieces.
12. String Lights and LED Accents
Don’t stop with your inflatable itself—wrap string lights or LED strips around nearby bushes, trees, or poles. It ties your display together and adds that extra sparkle. Some LED strips even let you customize colors and effects for a perfect vibe.
13. Weatherproof Storage Bags
After the season ends, proper storage is key to keeping your inflatables in good shape. Weatherproof storage bags big enough to avoid compressing them too much protect against moisture and pests—and some have compartments to keep your stakes, cords, and repair kits organized.
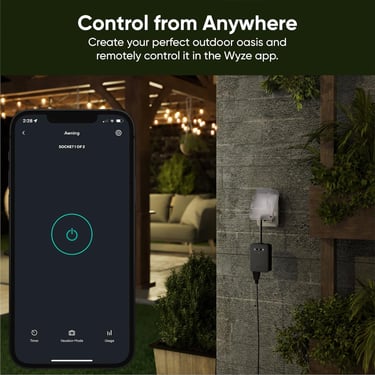
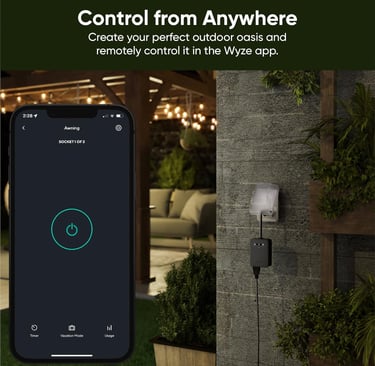
14. Smart Plugs and Voice Control
If you’re into smart home tech, smart plugs are your friend. Control your inflatables via Alexa, Google Assistant, or Siri—turn them on/off, adjust timers, or sync with other devices using simple voice commands. It’s futuristic convenience for the win.
15. Inflatable Covers and Canopies
Extra protection goes a long way—lightweight canopies or inflatable-specific covers shield your decorations from rain, snow, or debris, keeping them looking great throughout the season.
16. Customized Base Decorations
Props like artificial snow, hay bales, wood chips, or miniature fencing add personality and context to your display. These little extras help create a scene that’s both inviting and protective—plus, they keep curious kids and pets at bay.
17. Outdoor Extension Cords with Multi-Outlets
For bigger displays, outdoor-rated extension cords with multiple outlets keep things neat and safe. Choose colors that blend with your landscape—green or black cords won’t distract from your decorations.
18. Weather Sensors
For the ultimate peace of mind, install weather sensors that monitor wind, rain, and temperature. Advanced sensors can even trigger smart plugs to shut off inflatables during bad weather, protecting your investment automatically.
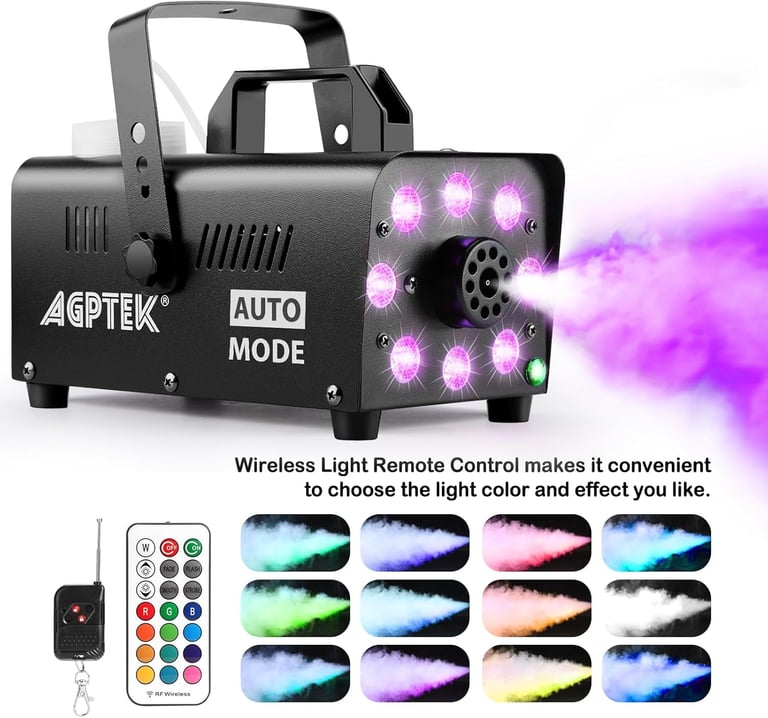
19. Fog Machines for Added Atmosphere
Want to add mystery or drama? Pair inflatables with a fog machine. It’s perfect for spooky Halloween displays or creating a magical winter wonderland vibe.
20. Inflatable Accessories for Specific Themes
Many inflatables come with matching accessories—think Santa’s sleigh or a vampire’s throne. Adding these props turns your display into a cohesive story and gives it that “wow” factor neighbors will remember.
Final Thoughts
With the right accessories, your inflatable display won’t just look good—it’ll be easier to manage, safer, and way more fun. Whether you’re after convenience, creativity, or just a bit of extra sparkle, these add-ons will help your setup stand out as the holiday highlight of the neighborhood. Ready to take your decorations from “nice” to “wow”? Let’s get accessorizing!
Conclusion
Outdoor holiday inflatable decorations are so much more than just yard ornaments—they’re a wonderful way to spread joy, spark wonder, and transform your home into a shining beacon of festive spirit. When you pay attention to thoughtful setup, regular maintenance, and safety, your display will stay vibrant and hassle-free all season long.
The care and effort you put into planning and maintaining your inflatables will shine through in the smiles they bring—to your family, your neighbors, and everyone passing by. So as you get ready to deck your yard this year, think beyond just the basics. Let your inflatables tell a story, showcase your unique personality, and add that unforgettable sparkle to the holidays.
Because at the end of the day, it’s about creating moments that light up hearts and make your home a place people love to visit and remember.
Related articles:
Protect Inflatables from Rain Damage: Simple Tips
How to Protect Your Pets: Outdoor Power Cord Safety Tips
Ultimate Guide to Powering Your Easter Inflatables Safely
5 Professional Methods for Securing Holiday Inflatables
Best Tips for Positioning Your Inflatable Holiday Decor