Top Halloween Display Ideas to Save Energy and Money
Want jaw-dropping Halloween inflatables without a scary bill? Learn Frosty’s 3-phase plan for energy-efficient, unforgettable haunted displays.
By Frank "Frosty" Adminei
9/25/20256 min read

Introduction: Frosty’s Haunted Yard Philosophy
As the crisp autumn air sweeps in and the first pumpkins pop up on porches, my heart starts racing. For me—Frank "Frosty" Adminei, holiday decoration fanatic—Halloween isn’t just another holiday. It’s a chance to transform an ordinary yard into a theatrical haunted wonderland that makes jaws drop and kids squeal with delight.
My specialty? Turning inflatable Halloween decorations into sprawling, larger-than-life displays that wow the neighborhood—all while keeping my energy bill frighteningly low.
Here’s the secret: creating a yard full of towering inflatables and glowing ghouls doesn’t have to cost a fortune. With smart planning, efficient gear, and the right storage habits, you can pull off a spine-tingling inflatable Halloween display that looks premium but runs on pennies.
This guide is my proven three-phase blueprint:
Phase 1: Plan your inflatable haunt like a pro.
Phase 2: Execute with energy-efficient lighting, smart plugs, and inflatable know-how.
Phase 3: Store your gear properly so it lasts for years.
By the end, you’ll know how to create an unforgettable Halloween yard that’s big on scares but small on costs.
For a complete guide to powering inflatables efficiently, visit The Complete Guide to Energy, Power & Smart Tech for Holiday Inflatables
Table of Contents
The Frosty Philosophy: Bigger Thrills, Smaller Bills
Phase 1: The Blueprint for a Budget-Friendly Inflatable Haunt
Phase 2: The Eerie Execution – Installation & Automation
Phase 3: The Frugal Finale – Take-down & Storage
Frosty’s FAQ: Inflatable Halloween Edition
The Frosty Philosophy: Bigger Thrills, Smaller Bills
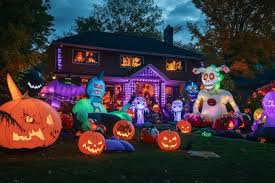
When most people think of epic Halloween inflatables, they picture giant dragons breathing smoke, pumpkin archways looming over trick-or-treaters, or towering grim reapers that seem to touch the sky. But here’s the truth: impact doesn’t equal waste.
My decorating mantra is simple:
🎃 Every inflatable should tell part of the story.
🔌 Every watt should earn its keep.
💡 Every light should serve drama, not clutter.
Think of yourself as a stage director. Your inflatables are the actors, your lighting is the script, and your electricity is the budget. A single well-placed inflatable arch with LED accents can look more powerful than five random blow-ups scattered across the yard.
The U.S. Department of Energy reports that LED lighting uses up to 75% less energy than old-school incandescent bulbs (DOE.gov). Combine LEDs with inflatables—which run on small internal fans averaging 60–100 watts per unit (EnergyStar.gov)—and you’ve got a display that looks huge but costs only a few cents per hour to operate.
That’s the essence of the Frosty Philosophy: controlled creativity, maximum spectacle, minimum spend.

Phase 1: The Blueprint for a Budget-Friendly Inflatable Haunt
Before you buy another inflatable witch or string of pumpkin lights, you need a plan. Rushing in is the fastest way to end up with a cluttered, overpriced, energy-guzzling mess.
The Spooky Savings Site Survey
Grab your notepad (and maybe a mug of apple cider) and head outside. Map your yard like a designer:
Locate outlets. Where will your inflatables plug in? Shorter extension cords = less wasted power.
Mark focal points. Do you have a big tree? A pathway? A porch? Each can host a themed inflatable zone.
Plan flow. Imagine how visitors will walk through or view your yard. Place inflatables along the “journey.”
One year, my site survey revealed I could consolidate three inflatables and two floodlights into a single power source by rearranging props. That one tweak shaved 20% off my display’s energy use.
Powering Your Haunt: Inflatable-Friendly Gear
Inflatables already run efficiently, but you can stretch savings further:
Use LED-lit inflatables. Many modern inflatables come pre-lit with LEDs instead of halogens. LEDs use a fraction of the energy and last longer.
Add solar pathway lights. These are perfect for leading trick-or-treaters to your inflatable archway without drawing grid power.
Deploy battery-powered tea lights. Slip them inside inflatable pumpkins or around inflatable graveyards for safe, flickering effects.
Frosty’s Winter Workshop Tip: Want more drama without more watts? Place reflective mylar blankets or aluminum panels behind inflatables. One spotlight suddenly looks like three.
For more ways to enhance your Halloween display efficiently, read Best Halloween Projectors: Transform Your Display Into a Haunted Masterpiece.
DIY Delights: Handmade Meets Inflatable
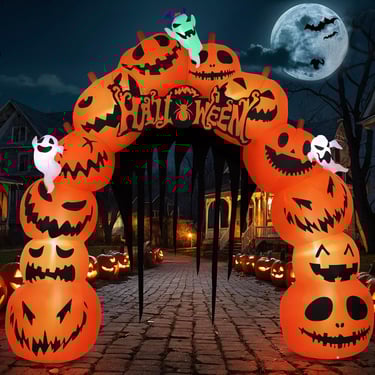
Don’t underestimate the power of homemade props working alongside inflatables. An inflatable skeleton carriage looks incredible pulling up to a DIY foam gravestone. Pairing inflatable and handmade elements gives your yard texture—without doubling your electric load.
An inflatable archway creates a grand entrance while Jack-o-Lanterns guide visitors efficiently.
Phase 2: The Eerie Execution – Installation & Automation
Now comes the fun part: bringing your inflatable haunt to life. This phase is all about smart setup that maximizes spectacle and minimizes electricity waste.
For general energy‑saving strategies that apply beyond Halloween, see Save Energy Without Dimming Your Holiday Spirit.
Smart Spookiness: Automating Your Display
Forgetting to turn off your inflatables overnight is a budget killer. Enter timers and smart plugs:
Mechanical timers → Simple, affordable, reliable. Set your inflatables to run from 6–10 PM and never worry again.
Smart outdoor plugs → Control your inflatables from your phone. Some even show real-time energy use, so you can monitor exactly what each ghost is costing you.
Essential Tools: Smart outdoor Wi-Fi plug – runs multiple inflatables, works with Alexa/Google, and saves hours of wasted power.
Location, Location, Location
Placement matters more than quantity:
Group inflatables by theme. A trio of pumpkins grouped together feels grander than the same three scattered.
Layer lighting. Use one LED floodlight per inflatable to add shadows and drama.
Create vignettes. Think of mini “scenes”—a witch stirring a cauldron, a skeleton band, a spooky tunnel.
The Brightest Idea: Lumens vs. Watts
Inflatables rely on internal fans, but most come pre-lit. When adding extra lights, choose LEDs with high lumens (brightness) and low wattage (energy use).

Phase 3: The Frugal Finale – Take-down & Storage
Here’s the part decorators dread: packing it all away. But trust me, storage is the secret weapon to saving money. Take care of your inflatables, and they’ll last for years without costly replacements.
Deflate with Care
Turn off the fan and let the inflatable deflate naturally. Forcing it down risks tearing seams.
Brush off dirt, leaves, or moisture before folding. A damp inflatable can mold in storage.
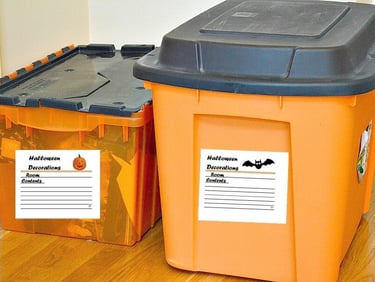
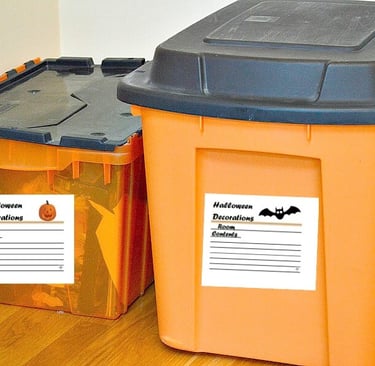
Pack It Right
Use labeled bins. Store each inflatable in its own bin with silica packets to absorb moisture.
Wrap lights carefully. Wind LED strands around cardboard to avoid tangles.
Protect electronics. Fog machines and projectors belong in climate-controlled storage.
Hidden Gem: Heavy-duty rolling storage bins make hauling large inflatables much easier and protect them from dust and pests.
Frosty’s Rule of Three
I follow my own storage mantra:
Clean before storing.
Separate by type. (Inflatables, lights, cords in different bins)
Label everything. Future-you will thank present-you.
One year, I skipped cleaning and pulled out a moldy inflatable spider the next season. Never again.
Smart storage protects inflatables, lights, and electronics so they last for years.
Frosty’s FAQ: Inflatable Halloween Edition
Do inflatables use a lot of electricity?
Not really. Most large inflatables run on 60–100 watts, about the same as a standard light bulb. Run a 100-watt inflatable for 5 hours nightly in October? That’s less than $2/month in most areas.
What’s the best time to run inflatables?
Evening hours (6–10 PM) give maximum visibility while minimizing wasted electricity. Use a timer so you don’t forget.
Can inflatables run in the rain?
Yes, most are made from weather-resistant polyester, but always check the manufacturer’s rating. Bring them in during heavy storms to extend lifespan.
How do I keep inflatables from blowing away?
Always stake them down with included tethers. For windy regions, upgrade to heavy-duty ground anchors ([affiliate link])—a lifesaver for 12-foot skeletons.
Conclusion: Your Yard, Your Wonderland
Halloween should be about thrills, chills, and community fun—not dreading the electric bill. With smart planning, efficient inflatables, LED lighting, and careful storage, you can create a jaw-dropping display that feels massive but costs next to nothing to run.
Remember Frosty’s mantra: controlled creativity. Place your inflatables with intention, light them for drama, automate them for savings, and store them for longevity.
This year, don’t just decorate—direct a Halloween spectacle that makes neighbors stop in their tracks and kids beg to walk through twice. And when you see your power bill? You’ll smile, knowing your monsters looked terrifying but cost less than a latte to keep alive.
So fire up those fans, stake down those inflatables, and let’s make this Halloween your most magical (and budget-friendly) one yet.
Related articles:
How to Create a Safe and Spooktacular Halloween Yard Display
Top 15 Accessories to Upgrade Your Inflatable Halloween Display
Best Halloween Projectors 2025: Transform Your Display Into a Haunted Masterpiece
Beginner’s Guide to Creating Inflatable Halloween Displays That Wow
Creating a Magical Inflatable Halloween Display: Themes and Inspiration
How to Use a Fog Machine for the Ultimate Spooky Halloween Display