Top DIY Hacks to Update Your Holiday Inflatable Decorations
Yes, you can paint inflatable decorations! Learn the best way to spray paint, add LED lights, and clean outdoor inflatables without causing damage.
6/21/20259 min read
FAQ: Decorating Inflatable Holiday Decorations
1. Can you paint inflatable holiday decorations?
Yes! You can paint inflatables using fabric paint or acrylic paint mixed with fabric medium. These options are flexible and weather-resistant, helping prevent cracking or peeling. Always clean and deflate the inflatable before painting, and apply paint in thin, layered coats.
2. What are the best ways to make inflatables stand out at night?
Add LED lights! Use battery-powered, plug-in, or solar LED lights inside, under, or behind the inflatable for glowing effects. You can also wrap LED strips around edges or use color-changing bulbs for dynamic nighttime displays.
3. How can I add motion or effects to inflatable decorations?
Enhance your inflatables with motion using small fans, rotating motors, or built-in animated features. For extra flair, projectors can add swirling snow, spooky shadows, or festive animations without needing extra props.
Introduction
Bored with the same holiday decorations? Want to make your home stand out? It is time to get creative with inflatable holiday decorations! You can paint them, add cool lights, or even make them move. Read on to learn how to make your holiday display the best on the block.

Painting Your Inflatable Holiday Decorations for a Unique Look
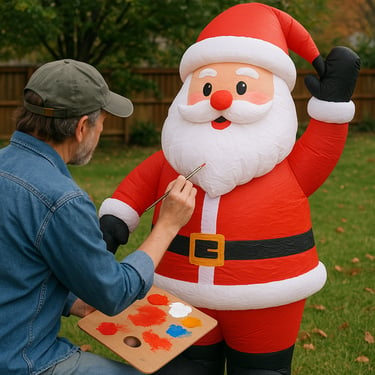
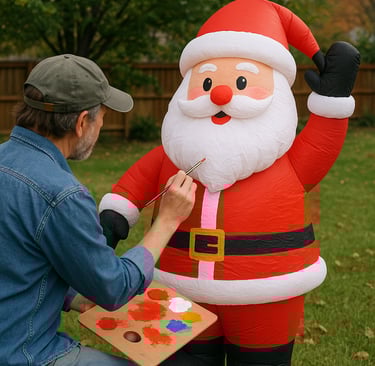
Tired of the same mass-produced inflatables as your neighbors? Customizing your holiday decorations with paint is a creative way to add a personal touch while standing out from the usual store-bought displays. Whether you want to refresh an old inflatable or create a completely unique design, painting your inflatables can be a game-changer—if done correctly.
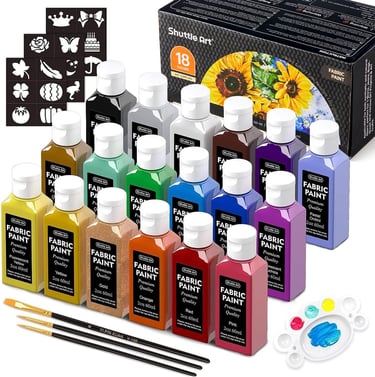
Materials You’ll Need
Not all paints work on inflatable materials, so choosing the right supplies is crucial to getting long-lasting, weather-resistant results.
Best Paint Types for Inflatables:
Fabric Paint – Flexible and designed for textiles, fabric paint is the best choice for painting inflatables without causing cracks or peeling.
Acrylic Paint with Fabric Medium – If you can’t find fabric paint, mix acrylic paint with a fabric medium to improve adhesion and flexibility.
Spray Paint (with Caution) – Some spray paints work, but they can crack or peel over time, especially if the inflatable expands and contracts frequently. Look for a vinyl-safe formula.
Essential Tools:
Brushes & Sponges – Use soft-bristle brushes for details and sponges for blending colors or creating a textured effect.
Painter’s Tape – Helps create clean lines and prevent paint from bleeding into areas you want to keep untouched.
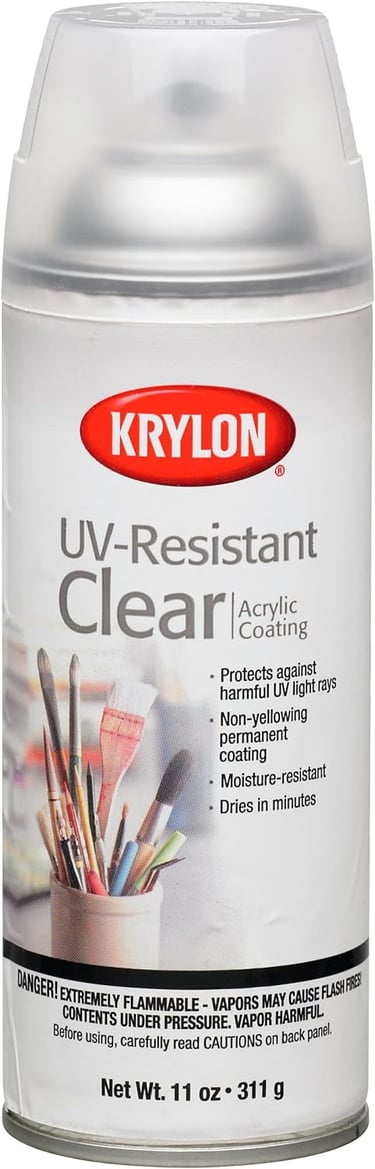
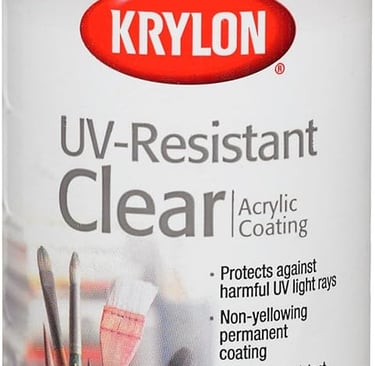
Protective Coatings – A clear waterproof sealant (like a UV-resistant spray) extends the life of your design and protects against fading, moisture, and cracking.
Step-by-Step Painting Instructions
1️⃣ Prepping the Surface
Clean the inflatable thoroughly – Dust, dirt, or residue can prevent paint from adhering. Use a mild soap and water solution, then let it dry completely.
Deflate the inflatable – It’s much easier to paint on a deflated surface, especially for detailed designs. However, some light coats can be applied while slightly inflated to ensure the paint stretches well.
2️⃣ Applying the Paint in Layers
Start with a base coat if you’re changing the entire color of the inflatable. Use a sponge or soft brush to prevent streaks.
Use painter’s tape for sharp edges or stencil designs. Want a candy cane stripe on a Santa inflatable? Tape off sections before painting!
Build up the color in thin layers – Thick paint applications can cause cracking once the inflatable is reinflated. Allow each layer to dry before adding another.
3️⃣ Creating Holiday-Themed Designs
Snowflakes & Frost Effects – Use a sponge with white fabric paint for a soft, blended effect.
Glowing Ornaments or Lights – Add shading and highlights for a three-dimensional effect.
Custom Lettering or Messages – Freehand with a fine brush, or use stencils for crisp, professional-looking text.
Tips for Durable Results
✅ Use Weather-Resistant Paints – Outdoor inflatables are exposed to rain, wind, and sunlight, so only use flexible, waterproof paints designed for fabric or vinyl.
✅ Subtle Accents Work Best – Instead of painting the entire inflatable, consider highlighting details (like shading Santa’s suit or adding gold trim to a Nutcracker). This reduces the risk of cracking while still making an impact.
✅ Allow Proper Drying & Curing Time – Some paints need 24-48 hours to cure fully. Always follow the manufacturer’s drying recommendations before reinflating.
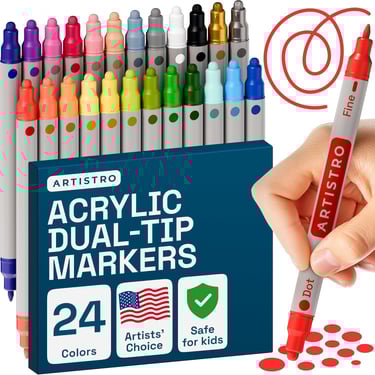
Best Markers for Decorating Inflatables
Sometimes, paint isn’t the best option—especially if you're adding fine details, bold outlines, or intricate designs on your inflatable decorations. That’s where markers and paint pens come in! Whether you want to give your Halloween ghost realistic cracks, add glowing eyes to a monster, or personalize your Christmas inflatables with custom lettering, the right markers make all the difference.
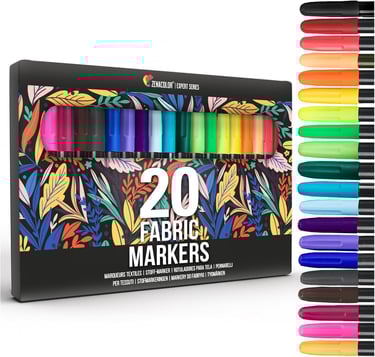
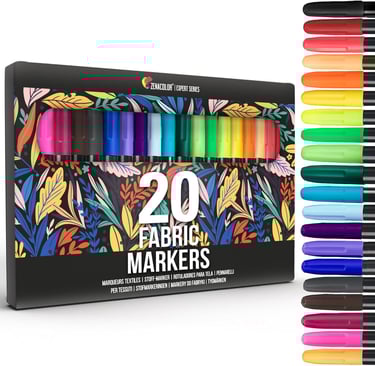
✏ 1. Fabric Markers (Best for Permanent Details)
Fabric markers are flexible, waterproof, and built to last, making them perfect for inflatables that expand and contract. Unlike regular markers, these won’t crack or smudge after drying.
✅ Why Choose Fabric Markers?
✔ Won’t fade or rub off easily
✔ Designed to work on soft, flexible surfaces
✔ Great for outlining, shading, and subtle details
👉 Best Uses:
Halloween: Adding stitches to zombies, cracks to ghosts, or veins to vampire inflatables.
Christmas: Outlining Santa’s coat, adding shadows to snowmen, or decorating reindeer harnesses.
Easter: Personalizing Easter eggs or writing names on inflatable decorations.
🖍 2. Paint Pens (Great for Bold, Solid Colors)
If you’re looking for vibrant, opaque colors that pop, paint pens are your best bet. Unlike regular markers, these apply like paint but dry quickly, making them smudge-proof and long-lasting.
✅ Why Choose Paint Pens?
✔ Bright, solid coverage (great for bold designs)
✔ Works on vinyl, fabric, and plastic surfaces
✔ Doesn’t smear once dried
👉 Best Uses:
Halloween: Drawing glowing eyes, adding blood splatters, or painting bold lettering.
Christmas: Creating hand-drawn snowflakes, holly leaves, or golden accents.
General Decor: Personalizing inflatable banners, adding shadows or highlights, or enhancing existing artwork.
Final Thoughts
Markers and paint pens offer an easy, mess-free way to decorate inflatables without dealing with paint spills or waiting hours for drying. Whether you're creating spooky shadows, festive accents, or customized lettering, having the right tools makes all the difference.
🎨 Pro Tip: Test on a small, hidden area before committing to a full design—some materials absorb ink differently!
Got a favorite marker brand for inflatables? Let me know—I’m always looking for the best tools for creative decorating! 🎃🎄🐰
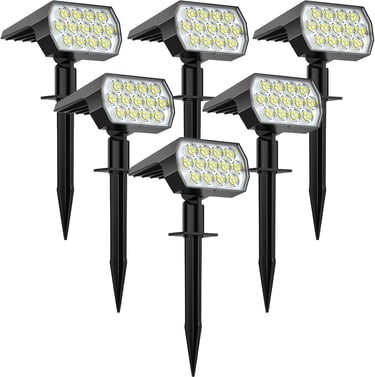
Adding LED Lights to Make Your Inflatable Decorations Stand Out
Want to make your inflatable decorations pop at night? Whether it’s a spooky Halloween ghost, a festive Christmas Santa, or a giant birthday balloon, adding LED lights can take your display to the next level. Here’s how to do it safely and creatively!
🎇 Why LED Lights Work Best for Inflatable Decor
LED lights are the top choice for illuminating inflatables because they are:
✅ Energy-Efficient – Use far less power than traditional bulbs, saving electricity.
✅ Low Heat Emission – No risk of overheating or damaging the inflatable.
✅ Long-Lasting – LEDs have a lifespan of 50,000+ hours, meaning they’ll last through multiple seasons.
✅ Flexible Placement – Available in different forms, including fairy lights, LED strips, and color-changing bulbs.
💡 How to Safely Add LED Lights
1. Choose the Right Power Source
🔋 Battery-Powered LEDs: Best for portable setups, no need for extension cords.
🔌 Plugged-In LEDs: Brighter, ideal for larger inflatables but require an outdoor-rated extension cord.
⚡ Solar-Powered LEDs: Eco-friendly option for long-term outdoor displays.
2. Secure Lights Without Damaging the Inflatable
Use zip ties or twist ties to fasten lights to the internal support structures.
Avoid adhesive-backed lights directly on inflatables—they may peel off or damage the material.
For external lighting, wrap lights around stakes or nearby objects instead of the inflatable itself.
3. Where to Place Lights for Maximum Glow
🎭 Inside the Inflatable – Place warm white or color-changing LED bulbs inside for an even glow.
✨ Underneath the Inflatable – Creates a dramatic underglow effect, perfect for ghosts, pumpkins, or floating designs.
🌟 Behind the Inflatable – Adds a silhouette effect for a creepy or magical vibe.
🔹 Around the Edges – Use LED strips to outline the inflatable for a bold, neon-like appearance.
🌈 Creative Lighting Ideas for Inflatable Displays
🎨 Color-Changing LEDs: Set up a remote-controlled RGB LED to switch colors for different effects.
👻 Backlighting for a Silhouette Effect: Place a bright white or colored light behind a spooky design to create eerie shadows.
🎄 LED Strips for Borders: Outline your inflatable with waterproof LED strips to make it stand out from a distance.
🕯 Flickering Lights for Realistic Effects: Use flickering LED candles inside pumpkins or haunted house inflatables for a realistic glow.
Final Thoughts: Light Up Your Inflatables Like a Pro!
Adding LED lights to your inflatables instantly enhances their visibility and creates a more dynamic display. Whether you go for a soft glow, dramatic backlighting, or colorful effects, these lighting techniques will make your decorations the highlight of the neighborhood!
💡✨ Ready to upgrade your inflatables? Try these LED lighting ideas and create a showstopping display!
Adding Motion to Your Inflatable Decorations
Want to take your inflatable decorations to the next level? Adding motion makes them more engaging, eye-catching, and dynamic! Whether you're creating a spooky Halloween ghost, a waving Santa, or a bouncing birthday balloon, movement brings your display to life.
🎭 Why Motion Makes a Big Impact
Adding motion to inflatables creates excitement and draws attention from a distance. Here’s why it works:
✅ More Realistic Displays – Moving parts make decorations feel alive and interactive.
✅ Better Visibility – A waving or rotating element grabs attention, even from far away.
✅ Fun & Unique Designs – Motion effects make inflatables stand out from ordinary static displays.
🔧 DIY Ideas for Adding Motion
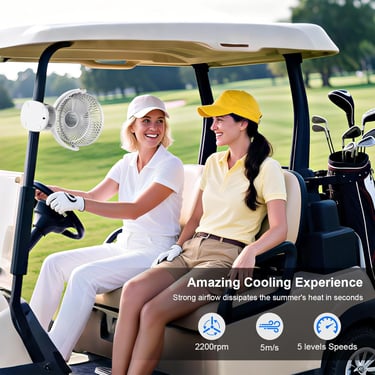
1. Use a Small Fan for Subtle Movement
💨 A hidden oscillating fan can make lightweight parts like capes, ghosts, or fabric elements gently sway.
🎭 Example: A ghostly figure that "breathes" with the movement of a soft fan inside.
2. Add Rotating Mechanisms or Motors
🔄 Small rotating motors can create dynamic movement:
Spinning props (e.g., rotating pumpkin heads, swirling snowflakes)
Turning elements (e.g., Santa waving or a reaper looking side to side)
💡 Pro Tip: Look for motorized Halloween props or turntable bases at party supply stores!
3. Incorporate Built-In Inflatable Motion Features
🎈 Some inflatables already include moving parts like:
Waving arms
Rising and falling ghosts
Shaking or bobbing figures
👉 When shopping, look for “animated” inflatables that come with built-in motors!
⚠ Tips for Safe Motion Effects
✔ Choose Lightweight, Durable Motors – Avoid motors that are too heavy, which can damage the inflatable.
✔ Don’t Overload the Structure – Adding too much weight or strain can cause air leaks or tipping.
✔ Use Outdoor-Rated Power Sources – Ensure motors and fans are weatherproof and plugged into GFCI outlets.
✔ Secure Moving Parts Properly – Use zip ties, Velcro, or fishing line to attach motion devices without tearing fabric.
🎭 Bring Your Inflatables to Life!
Motion transforms ordinary inflatables into show-stopping decorations. Whether it’s waving hands, eerie swaying ghosts, or spinning snowflakes, adding movement creates an eye-catching effect that makes your display unforgettable!
💡 Try these motion tricks today and make your inflatables the highlight of the season! 🎈✨

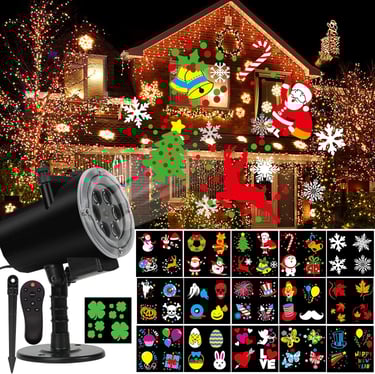
Why Projectors Are a Game Changer for Your Holiday Setup
Projectors enhance your holiday décor by:
✅ Creating Animated Effects – Project falling snow, swirling leaves, or dancing ghosts without extra decorations.
✅ Saving Space – No need to overcrowd your yard—use light projections to fill empty areas with festive visuals.
✅ Adding a Professional Touch – Perfect for both subtle and bold displays, making your yard stand out with minimal effort.
✨ How to Use Projectors with Inflatable Decorations
📍 Positioning the Projector for Maximum Effect
Angle the projector correctly to ensure the image lands on the desired surface (house, inflatable, ground, or trees).
Keep projectors out of direct light sources (like streetlights) to maximize brightness.
Place them at a safe distance to prevent shadows or distortion.
🌧 Best Projectors for Outdoor Use
When choosing an outdoor projector, consider:
✔ Weatherproofing – Ensure it’s rated for outdoor use (IP65 or higher).
✔ Brightness – Look for at least 1,500-2,000 lumens for visibility in different conditions.
✔ Projection Type – Options include:
LED projectors for crisp, bright images
Laser projectors for high contrast and durability
Slide projectors for simple, static visuals
🎥 Projecting Moving Elements
Falling snowflakes create a cozy winter wonderland.
Twinkling stars or floating ghosts add a magical or spooky effect.
Holiday-themed animations (like Santa flying or jack-o’-lanterns flickering) bring your display to life!
🎨 Creative Ideas for Projector Use
🎄 Snowflake patterns gently falling on your house, trees, or inflatables.
🎅 Festive messages like “Merry Christmas” or “Happy Holidays” projected onto walls.
🦌 Animated Santa & Reindeer flying across your house or garage.
👻 Spooky Halloween shadows like moving skeletons, witches, or ghosts.
🎆 New Year’s fireworks display without the noise!
✨ Make Your Holiday Display Unforgettable!
Adding a projector to your holiday setup transforms your space into an immersive, magical wonderland. Whether you want a soft snowfall effect or a full-on animated scene, projectors are the secret weapon to effortless holiday magic!
💡 Try it this season and wow your guests with a next-level light show! 🌟🎥

Conclusion
Customizing your inflatable holiday decorations with paint, LED lights, motion, and projectors is a fun and creative way to enhance your holiday display. With just a little time, effort, and some basic materials, you can transform those standard inflatables into showstoppers that truly reflect your festive spirit. Ready to get started? Share your own customization ideas and tips in the comments below, or take a photo of your holiday display and tag us—let’s spread the cheer!