The Best Maintenance & Safety Hacks for Holiday Inflatables
Keep holiday inflatables safe! Our handbook covers weather, pets, anchoring, & energy. Enjoy worry-free fun. Get tips now!
Frank Adminei
3/12/202523 min read
Introduction
Want your holiday inflatables to last longer and stay safe? Good care can help them last up to 50% longer! This guide shows how to keep your inflatables safe from weather and pets. Learn quick fixes, strong anchors, and ways to save energy. Get expert tips to keep your holiday displays looking great.
Keeping Your Inflatables Safe & in Top Shape: Why Maintenance Matters
Inflatables are the ultimate “set it and forget it” holiday decoration—until they suddenly sag, tear, or refuse to inflate at all. A little preventative maintenance can keep your display looking great while also preventing safety hazards (because no one wants a Christmas catastrophe in their front yard). Here’s why regular upkeep matters and how to avoid the most common issues.
🎯 Why Maintenance & Safety Matter
✔ Longevity:
Inflatables aren’t cheap. Proper care can double or triple their lifespan, saving you money in the long run.
✔ Weather Protection:
Rain, snow, wind, and extreme cold can wear down materials, weaken seams, and damage blowers.
✔ Safety for Kids & Pets:
Loose tethers, exposed cords, or sagging inflatables can become tripping hazards.
Curious kids (or dogs) may tug on wires or try to climb inflatables, leading to accidents.
✔ Fire & Electrical Safety:
Faulty extension cords or damaged blowers increase fire risk.
Overloading an outlet with multiple inflatables can trip breakers or cause overheating.
🌦 Weather, Wear & Tear: What Wrecks Your Inflatable?
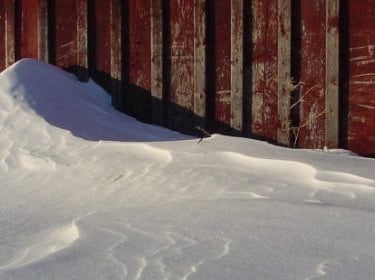
1️⃣ Extreme Cold & Snow
Problem: Freezing temps make fabric brittle and cause cracks or splits.
Solution: If a storm is coming, deflate and store your inflatable indoors until conditions improve.
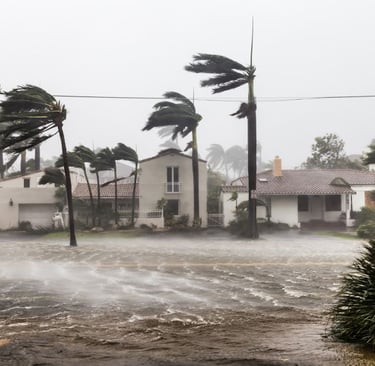
2️⃣ Heavy Wind & Rain
Problem: Strong gusts can rip tethers or send inflatables flying (bye-bye, Santa!).
Solution: Secure with extra stakes & bungee cords, and if winds exceed 20 mph, take it down temporarily.
3️⃣ Constant Sun Exposure
Problem: UV rays fade colors and weaken fabric over time.
Solution: Apply a UV protectant spray (like 303 Aerospace Protectant) once per season.
4️⃣ Power Supply & Electrical Issues
Problem: Frayed cords, overused extension cables, or cheap power strips can overheat and become dangerous.
Solution: Use outdoor-rated extension cords & surge protectors and check all wiring before plugging in.
🚑 Common Inflatable Issues & How to Prevent Them
✔ Weak or Sagging Inflation?
Check for small leaks – A light misting of soapy water can help spot air leaks (watch for bubbles).
Inspect the blower – Debris can clog the fan; clean it out with compressed air if needed.
Ensure full extension of fabric – Partially folded sections block airflow and lead to uneven inflation.
✔ Tears & Holes?
Use a clear vinyl patch or fabric repair tape for quick fixes.
For larger rips, sew the fabric with heavy-duty thread before sealing with weatherproof adhesive.
✔ Lights Not Working?
Check internal connections—sometimes, a wire gets loose inside the inflatable.
If bulbs are replaceable, swap in LEDs for a brighter, longer-lasting glow.
Final Thoughts
A little maintenance goes a long way. If you check for tears, blower issues, and weather wear every few weeks, your inflatable will stay bright, bouncy, and festive for years to come. Don’t wait until Santa deflates in a sad heap—stay ahead of common issues and keep your display in tip-top shape!
Weatherproofing Your Holiday Inflatables: Keeping the Festivities Going, Rain or Shine
As much as we love seeing our giant inflatable Santa waving in the yard, bad weather can be a serious buzzkill. From rain and snow to strong winds, mother nature can wreak havoc on your inflatable’s looks and lifespan. But don’t panic—there are simple, effective ways to keep your holiday display safe, sturdy, and looking great through all kinds of weather.
🌧️ Protecting Your Inflatables from Rain & Snow
1️⃣ Keep It Dry
Problem: Dampness is your enemy. Prolonged exposure to moisture can lead to mold, mildew, and fabric breakdown.
Solution:
Deflate during heavy rain to avoid water pooling inside.
Use water-resistant covers to protect the blower and fabric when it’s not in use.
If your inflatable gets wet, dry it completely before packing it away for storage.
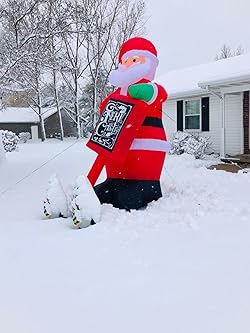
2️⃣ Snow and Ice
Problem: Snow buildup can weigh down the inflatable, while ice can freeze joints or tear fabric.
Solution:
Avoid leaving inflatables up during snowstorms if possible.
Brush off snow as soon as it accumulates—don’t let it build up.
Use snow guards or plastic sheeting to shield the inflatable from direct snow exposure.
💨 Windproofing: Standing Strong Against the Gusts
1️⃣ Tethering & Securing
Problem: High winds are a major threat. Your inflatable could end up in your neighbor’s yard if it’s not properly secured.
Solution:
Use extra tie-downs—bungee cords work better than standard stakes. For heavy inflatables, consider using heavy-duty ground anchors or sandbags to stabilize the base.
Make sure the inflatable is firmly staked into the ground. The more secure, the less likely it is to be blown away.
2️⃣ Wind Deflectors
Problem: Wind can cause the inflatable to sag or collapse.
Solution:
Set up wind barriers (like shrubs, fences, or large planters) to shield the inflatable from the brunt of the wind.
If you live in an especially windy area, deflate during gusty conditions (especially if sustained winds exceed 20 mph).
🛠️ Recommended Weatherproofing Materials & Products
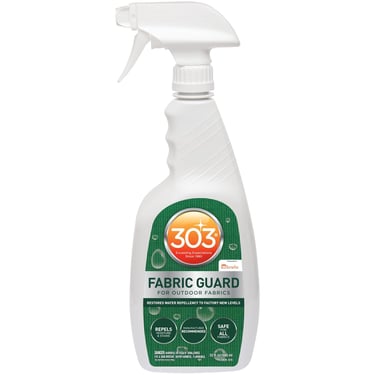
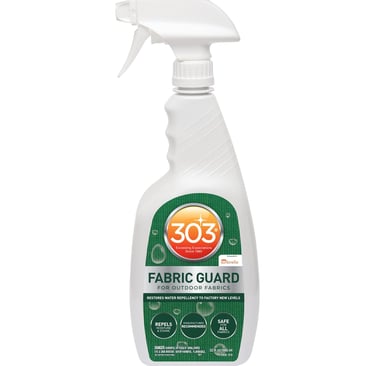
1️⃣ Weatherproof Spray
Use: Apply a waterproofing fabric spray to protect the material from moisture and UV rays.
Recommended Product: 303 Fabric Guard is a great option for extending fabric life and protecting from the elements.
2️⃣ UV Protectant
Use: Over time, sun exposure can fade colors and weaken fabrics. Apply UV-blocking protectants to maintain the vibrancy of your inflatables.
Recommended Product: 303 Aerospace Protectant not only protects against UV rays but also repels water.
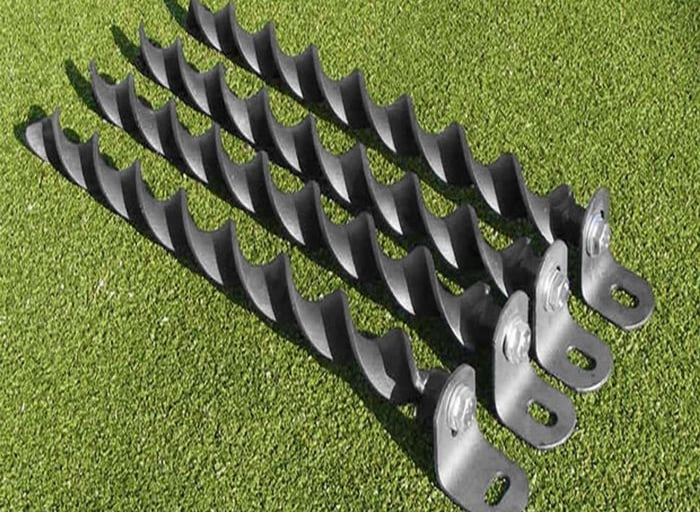
3️⃣ Reinforced Stakes & Tethers
Use: Standard stakes are fine for mild conditions, but reinforced stakes or ground anchors are your best bet for heavy-duty wind resistance.
Recommended Product: Y-stakes or super-duty spiral ground anchors provide more stability than regular stakes.
4️⃣ Blower Covers
Use: Protect the blower unit from rain and snow with a weatherproof cover.
Recommended Product: Look for outdoor-rated blower covers to keep the motor dry and functioning.
⚡ Quick Fixes for Minor Weather Damage
If the weather still manages to cause a little damage, don’t stress. Here are some quick fixes:
✔ Tears & Holes
Patch small rips with clear vinyl tape or fabric repair patches. For larger tears, use weatherproof fabric adhesive and reinforce with a patch.
✔ Deflating Blower
If your blower gets wet, dry it thoroughly and check the motor before plugging it back in. Keep a backup blower on hand for emergencies.
✔ Faded Colors
Use fabric-safe paint to restore color to certain parts of the inflatable. Just make sure to check that the paint won’t damage the material.
Final Thoughts
Weatherproofing isn’t just about preventing damage—it’s about ensuring your inflatable lasts for many seasons and continues to bring joy. By investing a little time in protecting your inflatables from the elements and having the right materials on hand, you'll be able to sit back, relax, and enjoy the holidays without worrying about a soggy Santa or a flying reindeer.
Repairing Common Inflatable Damages: Fixing Your Holiday Decor Like a Pro
Let's face it—no inflatable is indestructible. Over time, weather, usage, and even the occasional wayward pet or mischievous child can lead to tears, leaks, and general wear-and-tear. But don’t worry—most issues are fixable with a little effort and the right tools. Here's your go-to guide for repairing those annoying damages, plus knowing when it’s time to call it quits and seek professional help.
🔍 Identifying Common Damages: What to Look For
1️⃣ Tears & Rips
Signs: Visible holes or slits in the fabric, often caused by sharp objects or high winds.
What it affects: Weakens the structure of the inflatable and may lead to sagging or deflation.
2️⃣ Leaks
Signs: Slow deflation or an inflatable that doesn't stay fully inflated, even after the blower is running.
What it affects: The inflatable will start to sag or lose shape over time.
3️⃣ Wear-and-Tear
Signs: Fading colors, fabric thinning, or weak spots from exposure to sun, snow, or heavy use.
What it affects: The durability and longevity of your inflatable, possibly leading to rips or leaks later on.
🛠️ Step-by-Step Repair Methods: Fixing It Yourself
1️⃣ Repairing Small Tears & Rips
Step 1: Clean the area around the tear with a damp cloth to remove dirt or debris. Let it dry completely.
Step 2: Patch it up using a clear vinyl patch (for smaller rips) or a fabric patch (for larger holes). You can find patch kits at most hardware stores or online.
Tip: Use weatherproof adhesive for a more durable hold.
Step 3: Seal the edges of the patch with fabric adhesive for extra protection. Press down firmly for a secure bond.
Step 4: Let the patch cure for at least 24 hours before inflating again.
2️⃣ Fixing Leaks (The Soapy Water Trick)
Step 1: Inflate the inflatable fully and inspect the entire surface for leaks. You’ll need to test it with soapy water.
Step 2: Mix dish soap and water in a spray bottle and gently spray it over the surface. The soap will form bubbles where the leak is.
Step 3: Mark the spot where bubbles form and let it dry. Then, follow the patching method above.
Tip: Leaks can also appear at the seams—be sure to check these carefully and patch any problematic areas.
3️⃣ Addressing Wear-and-Tear (Fabric Thinning & Fading)
Step 1: For fading, apply a UV protectant spray like 303 Aerospace Protectant, which can help restore color and prevent future damage.
Step 2: For thinning fabric, consider reinforcing the area with a patch or fabric adhesive to prevent further weakening.
⚖️ When to Seek Professional Repair Services or Consider Replacements
While most minor repairs are manageable, there are situations where it’s better to leave the job to the pros or replace your inflatable altogether.
1️⃣ Extensive Damage or Large Tears
If the damage is too large (or in a tricky area like around the blower or seams), it might be more cost-effective and efficient to seek professional repair services. A reputable shop can seam weld or apply heavy-duty repairs that DIY kits can’t handle.
2️⃣ Structural Failure
If your inflatable is constantly deflating, even after repairs, or the fabric is too compromised to hold air, it may be time to consider replacing the inflatable. Even with the best repairs, there’s a limit to how much wear an inflatable can withstand.
3️⃣ Faulty Blowers or Motors
If the blower isn’t working properly, it might be repairable, but if it’s an electrical issue, it's best to leave this to the experts. Replacing the motor could be more cost-effective, depending on the brand and model.
4️⃣ Extreme Fading or Discoloration
If the colors have faded drastically or the inflatable no longer looks good, it may be a sign that the fabric is too worn out for further use, especially if it’s thinning as well. At this point, replacing it is your best bet.
Final Thoughts
Repairing your holiday inflatables doesn’t need to be intimidating—it’s all about identifying the problem, having the right tools on hand, and tackling it early. Most common damages, like small tears and leaks, are easily fixable, saving you from having to buy a new inflatable every season. However, knowing when to seek professional help or consider replacements is key to making sure you’re not investing too much time or money into something that’s past its prime. Stay ahead of the damage, and your inflatables will continue to shine for many holidays to come!
Ensuring Pet Safety Around Inflatables: Keeping Your Furry Friends & Decorations Happy
We all know pets can be curious, energetic, and sometimes a little too excited around anything new in the yard, including your shiny new holiday inflatable. As adorable as it is to see them bounding around your festive display, pets and inflatables don’t always mix well. Here's how to keep both your pets and inflatables safe while still enjoying a cheerful, pet-friendly holiday setup.
🐾 Tips to Keep Your Pets Safe & Prevent Accidental Damage
1️⃣ Preventing Pet-Inflatable Clashes
Pets, especially dogs, love to jump, bite, and paw at new things. To avoid them tearing up your inflatable, make sure to keep your pets from directly interacting with the display.
Use decorative barriers like garden fencing or planters to create a boundary between the inflatable and your pets. This way, your pets can enjoy the decorations from a safe distance.
2️⃣ Supervision is Key
Never leave pets unsupervised around inflatables, especially if they’re curious or prone to chewing. If your inflatable is set up in the yard and you’re busy with other activities, make sure you can monitor them or move the inflatable to a safer spot.
3️⃣ Repair & Maintain
Regularly inspect your inflatables for signs of wear—tears or punctures from playful claws or teeth can compromise safety. A sudden deflation or malfunction could become a hazard to both your pet and the inflatable.
4️⃣ Tripping Hazards
Pets may not always be aware of the tethering ropes or blowers that help your inflatable stay upright. Secure any loose cords or cables with ties or covers so your pets don’t trip or get tangled.
Keep the blower and electrical components out of reach to prevent any chewing or tampering.
📍 Best Practices for Positioning Inflatables Away from Pet Activity Zones
1️⃣ Location, Location, Location
Avoid high-traffic pet zones—don’t set up inflatables near your pet’s usual play area, dog house, or favorite resting spots. If you place your inflatable in a more open, less-traveled spot, your pets will be less likely to bother it.
2️⃣ Elevation is Your Friend
Try positioning inflatables in higher areas like raised decks or porches if possible. This keeps the inflatable out of easy reach for your pet while still allowing it to be visible and festive.
3️⃣ Keep Away from the Fence Line
If your pets like to hang around the fence line, keep your inflatables well inside your yard. This helps avoid curious paws getting tangled in ropes or running into the inflatable itself, which could cause damage.
4️⃣ Create a Buffer Zone
Set up garden beds, shrubbery, or decorative fences to keep pets at a distance. These natural barriers can make it harder for your pets to access the inflatable while still giving your yard a decorative touch.
🌱 Choosing Pet-Friendly Inflatable Designs & Materials
1️⃣ Durable Materials
Look for heavy-duty, puncture-resistant fabrics when choosing inflatables. While no inflatable is entirely “pet-proof,” some materials hold up better under the pressure of curious paws and teeth. Oxford fabric and PVC-coated nylon are two great options to consider for added durability.
2️⃣ Inflatable Designs
Opt for simpler, less fragile designs—overly complex, delicate inflatables with lots of small parts are more likely to be damaged by pets. Consider classic designs like giant snowmen, Santa heads, or large Christmas trees that are less likely to suffer from pet interference.
3️⃣ Soft Edges
If you’re buying inflatables for outdoor use, look for ones that don’t have sharp edges or exposed wiring. Some inflatables are equipped with softer, more pet-friendly designs, which can help minimize injury risks to your pets if they decide to investigate a little too closely.
Final Thoughts
Pets are part of the family, but they’re not always the best housemates for holiday inflatables. The key is keeping both your pets and inflatables safe by creating pet-free zones around your decor, choosing durable designs, and keeping an eye on your pet’s behavior. With a little bit of planning and some strategic positioning, you can have your festive fun without the worry of ripped inflatables or upset pets. Happy holidays to all—furry friends included!
Proper Anchoring and Setup for Stability: Keeping Your Inflatable Secure, No Matter the Weather
There’s nothing worse than seeing your inflatable Santa topple over or get blown across the yard in the middle of the night. Proper anchoring and setup are crucial to ensuring your inflatable stays upright and secure throughout the season. Whether you're dealing with a windstorm, a curious neighbor, or even enthusiastic pets, a stable inflatable will always be a joyful, stable fixture in your holiday display. Let’s dive into the importance of secure anchoring and how to get it right.
⚠️ Why Proper Anchoring Matters: No One Wants a Flying Reindeer
1️⃣ Preventing Tipping and Displacement
Inflatables are usually large and lightweight, which makes them highly susceptible to being tipped over or blown away by even moderate winds. Without secure anchoring, your inflatable could end up displaced or, worse, damaged.
Imagine walking outside and finding your inflatable halfway down the block—or worse, tangled in your neighbor’s bushes. It’s not just a visual issue, but a safety hazard, too.
2️⃣ Ensuring Stability for Safe Operation
Anchoring not only prevents movement but also ensures that the blower functions correctly. When an inflatable shifts, it may not receive the proper airflow needed to stay inflated. This could cause it to deflate or lose shape, which isn’t just disappointing—it could be dangerous to have an unstable display in the yard, especially with sharp or exposed edges.
🔧 Recommended Anchoring Methods & Equipment
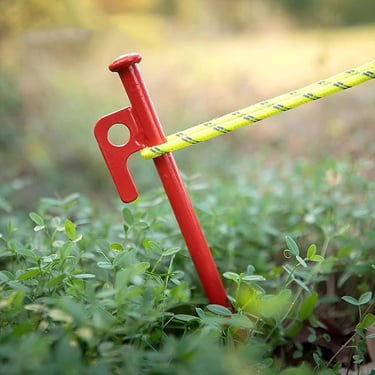
1️⃣ Ground Stakes
Traditional Ground Stakes are the most common method of anchoring. They are easy to use and effective in most conditions.
For softer ground (like grass or dirt), standard steel stakes work fine. Simply secure the tethers of your inflatable to the stakes and press them firmly into the ground.
For harder surfaces, like asphalt or cement, you’ll need to use heavier-duty stakes or sandbags. There are also specialty stakes designed for tougher terrain.
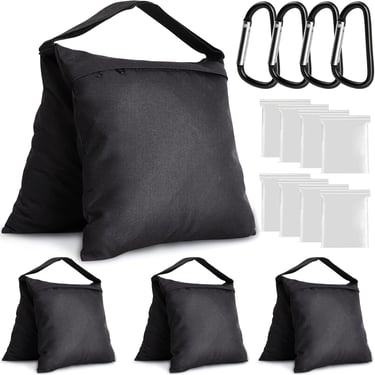
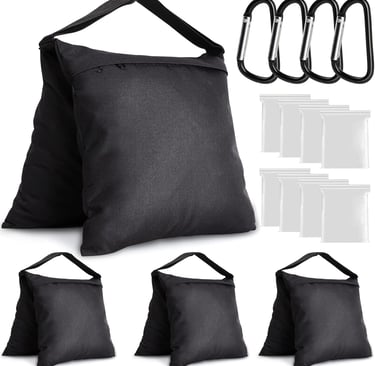
2️⃣ Sandbags or Weight Bags
If you’re dealing with high winds or hard ground where stakes aren’t feasible, sandbags are an excellent choice. They add extra weight, preventing the inflatable from blowing away.
Fill fabric sandbags or weighted bags and place them at the base of the inflatable.
You can also use anchor kits that come with heavy-duty weights and sturdy straps to ensure your inflatable stays put.
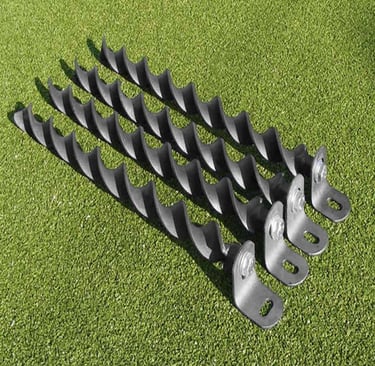
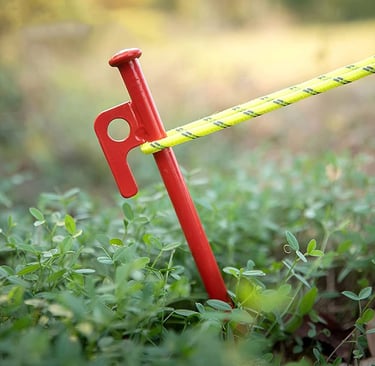
3️⃣ Spiral Ground Anchors
For extra security, spiral ground anchors are a solid option. These twist deep into the ground for a firm hold, making them ideal for areas with soft or loose soil.
Twist-in ground anchors are especially helpful for high-wind zones, where traditional stakes might not be enough.
4️⃣ Tie-downs & Cords
When setting up, you’ll need strong tie-down cords to connect the inflatable to the anchoring system. Bungee cords are popular because they allow for some flexibility and adjustment when the wind blows.
However, sturdy nylon ropes are more reliable for heavy-duty anchoring. Just make sure the cords are adjustable and can hold up against wind pressure.
🌍 Guidelines for Proper Setup on Different Terrains
1️⃣ Soft Ground (Grass, Soil)
Anchoring Method: Standard ground stakes or spiral anchors work best for soft, grassy areas.
Setup Tips:
Ensure the stakes are driven deep into the ground at an angle, which gives them better grip.
If the soil is too soft or muddy, sandbags or weight bags will provide the additional stability you need.
2️⃣ Hard Ground (Asphalt, Concrete)
Anchoring Method: Since stakes aren’t effective, sandbags or anchor kits with weight bags are your best option.
Setup Tips:
Use heavy-duty tie-downs to secure the inflatable to the anchor bags.
If you’re in a highly urban area and have limited space, smaller, more portable inflatables might be a better option.
3️⃣ Rocky Terrain
Anchoring Method: Spiral anchors are ideal for rocky soil, as they can be twisted into the earth for a firmer hold.
Setup Tips:
If the rocks are too large, use weight bags in conjunction with anchors, or consider securing inflatables against nearby structures, like walls or trees, as additional support.
4️⃣ Snowy or Icy Ground
Anchoring Method: Ice screws or snow anchors are designed to grip well in frozen ground.
Setup Tips:
If the ground is covered with a heavy snow layer, compact the snow beneath the anchor points to ensure a more secure foundation.
Weight bags can be a lifesaver in deep snow, helping to keep the inflatable from shifting.
Final Thoughts
Proper anchoring and setup are essential not just for keeping your inflatable in place, but for ensuring that it’s safe, stable, and looking its best all season long. The right tools and strategies will protect your investment from damage, displacement, and the unpredictable weather. Whether you’re dealing with soft soil, concrete, or snow, there’s a solution that fits every terrain. So, take the time to secure your inflatables properly—your holiday cheer depends on it!
Safe Usage in Bad Weather & Cold Conditions: Protecting Your Inflatable (and Your Holiday Spirit)
Extreme weather conditions can turn a festive display into a weathered mess if you're not careful. Whether it’s heavy rain, gusty winds, snow, or a sudden cold snap, knowing how to safely operate your inflatable in bad weather is key to maintaining both your decor and safety. Let’s dive into how to ensure your inflatables stay safe—and how you can continue to enjoy them without worrying about a malfunction or accident.
🌨️ Best Practices for Operating Inflatables During Extreme Weather or Cold Snaps
1️⃣ Avoid Operating During High Winds
Wind gusts are one of the biggest threats to inflatables, especially larger ones. It’s tempting to leave your inflatable out in the elements, but high winds can tip, tear, or carry your display away.
Best Practice: If winds exceed 25-30 mph, it’s better to turn off the inflatable and secure it until the winds die down. Check the forecast regularly to stay ahead of bad weather.
2️⃣ Set Up in Sheltered Areas
Whenever possible, try setting up your inflatable away from open fields, tall trees, or fences that might act as wind tunnels. Position it in a sheltered area, like the corner of your yard, to shield it from gusts.
Pro Tip: If you’re facing an especially windy season, invest in a wind-resistant inflatable or use heavier anchors and tie-downs to secure it.
3️⃣ Limit Operating Time in Cold Conditions
Extremely cold temperatures can affect how your inflatable functions. In temperatures below freezing, the fabric can stiffen, making it harder for the blower to keep the inflatable fully inflated. It can also increase the risk of tears if you’re not careful.
Best Practice: If you live in a region where temperatures drop significantly, try to limit how long the inflatable is on during the day. Consider deflating it at night to prevent freezing or damage.
⚠️ Safety Precautions to Prevent Accidents in Adverse Conditions
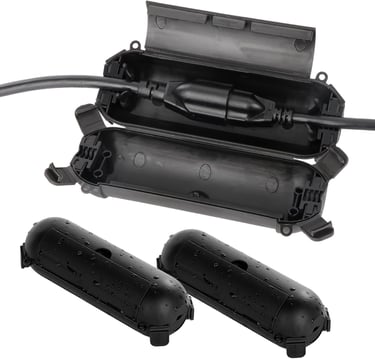
1️⃣ Keep Power Sources Safe & Dry
In wet or snowy conditions, water can seep into electrical components, causing potential electrical shock or short circuits.
Best Practice: Cover the blower and any exposed power cords with waterproof covers or tarps. Ensure the blower is placed on a dry surface (avoid puddles or snow buildup).
If it’s raining heavily, avoid using inflatables altogether until conditions improve. The last thing you want is a wet, malfunctioning inflatable creating a tripping hazard in the yard.
2️⃣ Be Cautious with Heavy Snow Accumulation
Snow accumulation on inflatables can lead to weighty stress on the fabric, causing it to collapse or tear. Wet snow can also freeze and make the inflatable difficult to deflate.
Best Practice: After a snowstorm, clear snow from the surface of the inflatable gently using a soft brush or broom to prevent puncturing the fabric. Never use sharp tools or excessive force!
Pro Tip: If you’re expecting heavier snow, consider bringing your inflatable inside during the storm and only re-inflating it once the snow has settled.
3️⃣ Regular Inspections for Damage
Cold snaps can cause materials to contract, leading to cracks or splits, especially in areas that were already a little worn.
Best Practice: Regularly inspect your inflatables for signs of damage during cold or wet weather. If you notice rips, weak spots, or compromised seams, take action immediately and repair them to avoid further issues.
❄️ How to Safely Power Your Inflatables When Temperatures Drop
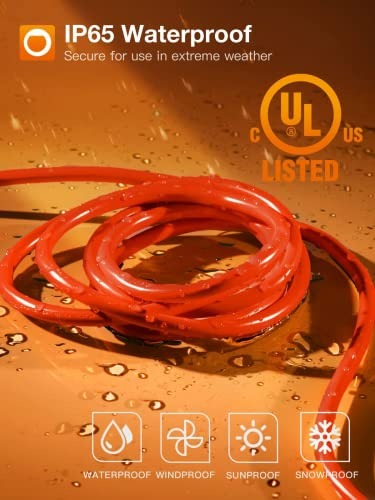
1️⃣ Use Outdoor-Rated Extension Cords
Using a regular indoor extension cord outside in cold temperatures is a recipe for disaster. Cold can cause the wire to become brittle, potentially leading to electrical shorts or exposed wiring.
Best Practice: Always use outdoor-rated extension cords that are specifically designed to handle cold and wet conditions. These cords are built to withstand freezing temperatures without cracking or becoming unsafe.
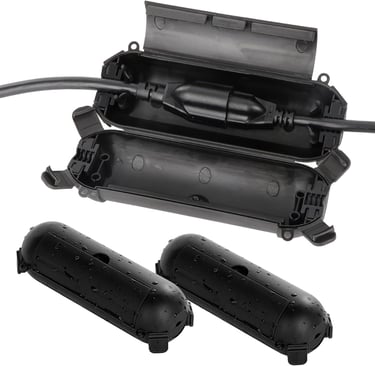
2️⃣ Keep the Blower and Electrical Components Dry
Water and electricity don’t mix—this is especially important when operating inflatables in wet or snowy conditions. Make sure that all connections are secure and dry.
Best Practice: Position the blower away from snow, rain, or puddles, and use waterproof covers to shield electrical components from moisture. Avoid running cords directly through puddles or areas where water can accumulate.
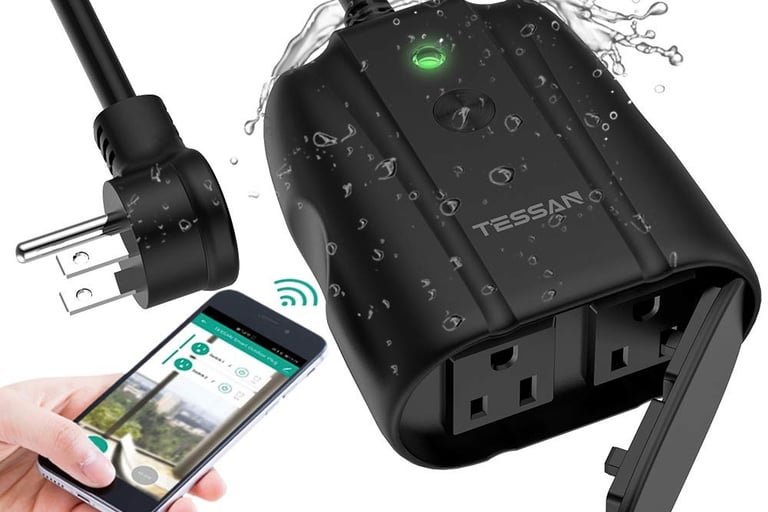
3️⃣ Use a Timer or Smart Plug for Controlled Operation
In freezing temperatures, having your inflatable on for long periods can cause damage or risk of freezing.
Best Practice: Consider using a timer or smart plug that can automatically turn off your inflatable after a certain amount of time. This helps conserve power and ensures the inflatable isn’t left running overnight, potentially freezing or overworking the blower.
Final Thoughts
Operating inflatables in bad weather or cold conditions may seem like a challenge, but it’s all about being prepared and cautious. By limiting exposure to high winds, protecting electrical components, and adjusting your setup to suit the conditions, you can keep your decorations safe and functional no matter the forecast. So, take some time to carefully monitor the weather, check your setup regularly, and don’t be afraid to take your inflatable inside when conditions get too harsh. Keeping your holiday decor safe during extreme weather doesn’t have to be a hassle—it just takes a little preparation.
Managing Energy Usage and Efficiency: How to Save Power While Keeping Your Inflatable Fun
Holiday inflatables bring tons of cheer to your yard, but let’s face it: they can also run up your electricity bill if you're not mindful. The good news is, you don’t have to choose between sustainability and festive spirit. With a few smart choices and simple practices, you can keep your inflatables running efficiently without breaking the bank or overloading your electrical system. Let’s talk about how to manage energy usage while ensuring your inflatables stay safe and functional.
⚡ Tips for Reducing Energy Consumption Without Compromising Safety
1️⃣ Choose Energy-Efficient Inflatables
Not all inflatables are created equal when it comes to energy usage. Some models are designed to use less electricity while still providing the same fun effect.
Best Practice: When purchasing a new inflatable, look for those labeled as energy-efficient or with low-wattage blowers. Modern inflatables have improved motors that use significantly less power.
2️⃣ Keep the Blower Clean and Maintained
A dirty or clogged blower will have to work harder, consuming more energy in the process. Dust, dirt, or debris can obstruct airflow and cause the motor to overheat.
Best Practice: Regularly clean the blower by vacuuming out dust or wiping it down. This simple maintenance step can extend the life of your inflatable and ensure it runs more efficiently.
3️⃣ Inflate When Needed, Deflate When Possible
As much as we love the look of inflatables glowing all night, they don’t always need to be fully inflated around the clock.
Best Practice: Turn off your inflatable when you don’t need it, like during the day or late at night when no one’s around to enjoy it. This helps you save electricity without compromising the aesthetic.
Use a timer or smart plug to automatically deflate your inflatable when it's not needed and reinflate it before guests arrive. This ensures that the blower isn’t running unnecessarily.
🔋 Comparison of Energy-Efficient Models and Power Sources
1️⃣ LED Lights vs. Traditional Lights
Many inflatables come with built-in lights to make them shine at night, but these lights can be power-hungry if you choose older models.
Energy-Efficient Option: Choose inflatables with LED lights. LEDs use up to 75% less energy than traditional incandescent bulbs and last longer. So, even though they might cost a bit more upfront, they will save you money in the long run by cutting energy use.
2️⃣ Battery-Powered Inflatables
Battery-powered inflatables are a great option for small displays or areas with limited access to outlets. They can also be a more eco-friendly option if paired with rechargeable batteries.
Energy-Efficient Option: If you want to cut down on power cords and plug-in usage, solar-powered inflatables are a unique and energy-efficient alternative. They charge during the day and run off solar energy, saving on electricity costs completely.
3️⃣ Power Source Comparison
Traditional Power Outlets: The most common source of energy for inflatables is your standard power outlet, typically running on 110-120 volts. While reliable, this can rack up the cost if used for long hours.
⏰ Guidelines for Setting Timers and Monitoring Usage
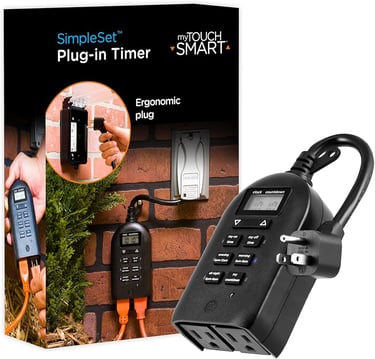
1️⃣ Set Timers for Automatic Shutoff
One of the easiest ways to save energy is by setting up your inflatable to run only when needed.
Best Practice: Use a timer or smart plug to schedule when your inflatable turns on and off. For example, you can set it to start at dusk and turn off by midnight, so it's running only when needed and not all night long.
2️⃣ Monitor Energy Usage with Smart Plugs
Smart plugs allow you to track how much power your inflatable is consuming and adjust its usage accordingly.
Best Practice: Invest in a smart plug with energy monitoring capabilities. These plugs connect to an app on your phone, giving you insights into the total power consumption of your inflatable. This can help you adjust its running hours and make adjustments as needed to cut back on unnecessary usage.
3️⃣ Follow Local Energy Tips for Peak Times
Many energy companies offer tips or even rebates for consumers looking to reduce their energy consumption during peak hours.
Best Practice: Check with your local utility to see if there are incentives or tips on how to reduce electricity use, especially during the winter months when heating needs are already demanding energy.
Final Thoughts
Managing the energy usage of your inflatables doesn’t have to mean sacrificing the magic of your holiday display. By choosing energy-efficient models, maintaining your inflatables properly, and using tools like timers and smart plugs, you can cut down on energy consumption without losing the festive glow. So, the next time you set up your inflatable, take a step back and think about how you can save a little energy while still keeping the fun alive. Your wallet (and the planet) will thank you!
Additional Tips: Cleaning, Storage, and Advanced Maintenance for Long-Lasting Inflatables
If you want your inflatables to last beyond one season, proper cleaning, storage, and advanced maintenance are essential. Inflatables may seem like simple decorations, but they require a bit of TLC to keep them looking fresh and functioning properly year after year. Let’s break down some pro tips for keeping your inflatables in top shape—no matter the season.
🧽 Effective Cleaning Methods to Remove Dirt and Prevent Mold Buildup
1️⃣ Clean Regularly After Use
Inflatables are exposed to the elements—dirt, dust, rain, and snow—and these can build up over time. If you leave your inflatable dirty, you risk stains and mold growth.
Best Practice: After each use, gently wipe down the surface with a soft cloth or sponge and some mild soap. Avoid using harsh chemicals that might damage the fabric. A garden hose works wonders to rinse off any dirt, but don't use high-pressure water, as it can cause tears.
2️⃣ Prevent Mold and Mildew Buildup
Mold loves damp, warm conditions, so proper drying is essential to avoid mold growth.
Best Practice: After cleaning, make sure to thoroughly dry your inflatable before storing it. Lay it flat in a well-ventilated area or hang it in the sun. Don't fold it up until it's completely dry to avoid trapping moisture inside, which will lead to mildew.
3️⃣ Spot Clean Stains Immediately
If your inflatable gets a stain, treat it ASAP before it sets.
Best Practice: Use a gentle stain remover that’s safe for fabric, or try a DIY solution like a mix of baking soda and water. Always test in a small area before applying to the whole surface. For tougher stains, you can use a soft brush to gently scrub.
📦 Storage Solutions to Protect Your Inflatables During the Offseason
1️⃣ Clean and Dry Before Storing
The number one rule of storing inflatables is to never store them wet. This invites mold, mildew, and other forms of damage.
Best Practice: Always ensure your inflatable is clean and completely dry before putting it away. If necessary, give it an extra day to dry in a warm, dry space.
2️⃣ Store in a Cool, Dry Area
Storing your inflatable in a cool, dry place will prevent damage from humidity, heat, and cold. Avoid areas where it’s likely to get wet or where sunlight will cause the fabric to fade.
Best Practice: A storage bin with a lid or a large tote is perfect for keeping your inflatable organized and free from dust. Just make sure the storage container allows for some airflow to prevent moisture buildup inside.
3️⃣ Avoid Overstuffing
It’s tempting to shove everything into the storage space to save room, but overstuffing will cause wrinkles and may stretch out the fabric.
Best Practice: Roll the inflatable loosely and avoid tight packing. If possible, store it on a high shelf or in a dedicated space where it won’t get crushed.
🔧 Advanced Maintenance Techniques and Periodic Checklists for Longevity
1️⃣ Check for Wear and Tear Regularly
Before and after each use, inspect your inflatable for any signs of damage. Even small rips can worsen over time.
Best Practice: Look for seam stress, punctures, or loose parts. Also, inspect the blower to ensure it’s still running smoothly. If you find any damage, repair it immediately before using the inflatable again.
2️⃣ Repair Small Tears and Punctures Immediately
Small tears can get bigger fast if left unaddressed.
Best Practice: Use an inflatable repair kit to fix minor rips or punctures. These kits typically include patches and adhesive that are designed for outdoor materials. Make sure the repair is completely dry before inflating the decoration again.
3️⃣ Periodic Blower Maintenance
The blower is the heart of your inflatable, and keeping it in top shape is crucial for efficient operation.
Best Practice: Periodically clean the blower to prevent dust and debris buildup. You can use a vacuum attachment or a soft brush to clean the fan and motor. Ensure the blower is free of obstruction to allow optimal airflow.
4️⃣ Keep an Eye on the Electrical Components
Over time, power cords and electrical components can wear out due to exposure to the elements.
Best Practice: Regularly check the cords, plugs, and electrical connections for any signs of fraying, cracks, or rust. If you notice any issues, replace the components before using the inflatable again. This prevents fire hazards and keeps your inflatable running smoothly.
🛠️ Periodic Checklists for Long-Lasting Inflatables
Before Each Use:
Check for visible damage (tears, holes, etc.).
Ensure the blower is clean and functioning.
Inspect electrical connections for any wear.
After Each Use:
Clean and dry the inflatable thoroughly.
Turn off and store it properly.
Check for minor damage or wear and address immediately.
Seasonal Check (Before Storage):
Perform a deep clean and check for any damage that may have gone unnoticed.
Dry the inflatable fully before folding.
Inspect the blower and all components for wear and tear.
Store in a cool, dry place, ensuring it’s not exposed to moisture or extreme temperatures.
Final Thoughts
Caring for your inflatable is an ongoing process, but the results are worth it. By regularly cleaning, storing properly, and performing maintenance checks, you’ll prolong the lifespan of your decorations and keep them looking as good as new for years to come. It’s all about that balance between enjoying your inflatable now and ensuring it’s ready for next season. So, give your inflatable the care it deserves, and it’ll continue to bring cheer to your home, season after season.
Conclusion
Holiday inflatables can last for years with good care. Weatherproof them, fix rips fast, and keep pets away. Save money by using less power and storing them safe when done. Get started now for a fun and bright holiday season!